Alaska Sea Grant

Investigations

Investigations

Class Time Required

Activity 1A: 2 class periods
Activity 1B: 1-2 class periods
Activity 1C: 2 20-30 minute periods plus time for exploration in centers
Activity 1D: 1-1 1/2 hour periods, ongoing throughout unit

Materials Needed
Teacher Preparation

Investigate school area for outdoor sites, prepare student field materials, gather materials for backpacks, find and assemble materials and create classroom centers Image.

Read Teacher Background for more information.

Prior Student Knowledge Prior experience with use of science tools and/or with hunting and gathering would be helpful, though not necessary.
Vocabulary

aquatic, awareness, boundaries, compare, data, describe details, environment, eye level, ground level, marine biologist, notice, observation, plot, role-play, science notebook, sort, subsistence, weigh, wonder.

Specific names of plants and animals around the school environment.

Science GLEs Addressed

K-12 Standards A1, A2, C2, G2, G3, G4

Investigation1Overview: Students begin to notice and discover aquatic plants and animals in this introductory investigation. They take a walk to get an overall view of the plants and animals around them, and begin to observe, wonder, and ask questions. Next, they practice looking closely as they examine and discover what is happening in one small square of the schoolyard. After learning about the roles of marine biologists and subsistence users, and finding out about tools that can help them make observations, students continue to explore and discover aquatic life through a variety of learning centers set up in their classroom.

Focus Questions:

  • What plants and animals live in the environment around our school?
  • What's happening in one small square, near or in the water?
  • How do scientists and subsistence users discover aquatic plants and animals?

Activity 1A: Around Our School

(2 class periods)

Focus Question: What plants and animals live in the environment around our school?

Engagement (5-10 minutes):
Explain to the students that they will be taking a walk around the playground, or in another area adjacent to the school. Brainstorm with the children about what they can expect to see. Make a list of plants and animals that they might see during the school year. Ask students to think about what they might see in a different season of the year, and why some plants and animals are seen during certain times of the year.

Exploration (20-30 minutes):
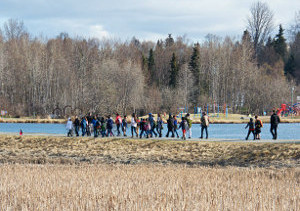
Practice observation skills on a walk outside the school: look, listen, and notice the surrounding environment. Assist children to “see” the plants and animals that live near the school. Encourage them to look down at the ground around them, at eye level (trees, bushes) and also up higher (tall trees, mountains, sky). It’s important that children get the big picture of their local environment before being asked to look into a smaller area in the next activity. Encourage them to name what they see, and point out birds, trees, and other things that they notice. Have children gather in small groups to explain their view through simple games such as “I Spy,” a sound game (listening), and a camera game. For the camera game, have children gaze around and then focus on one thing, and then use their ear as the button to take the picture with their eye (camera).

Explanation (30 minutes):
Back in the classroom, help children discuss what they saw. Gather in the group area and write their ideas on a list. The list will be used to support children’s thinking when they write in their science notebooks, and it will be useful to divide the list in some way. You might divide the list by “level” (ground level, eye level, sky level) or by “area” (near a creek, next to the road, by the building).

Have children write in their science notebooks, using the left side of a clean page. If appropriate, divide the page into three boxes with horizontal lines to match the class list.

Ask students to think about their time outside and record three things that they noticed on the walk. Use any “levels” or “areas” from the class list, and have them choose one thing from each; for example, they might choose one thing from the ground or near their feet, one thing from eye level, and one thing taller than them. They should list details that they noticed about each thing. As students finish writing, have them share with each other, and again with the whole group once they are gathered together.

Elaboration (20 - 30 minutes, next day or later):
Remind students of the walk they took to look for signs of animals and living plants. Show them an O-W-L chart and explain that making lists of what they have observed will help to keep their “scientist’s eyes” open to new plants and animals they learn about.

Ask the students to take a moment to remember what was most interesting. If time has passed, guide children through the walk once again, in their mind’s eyes. Describe the route taken and have children describe what they noticed. Write responses on the chart under “O”: “What we have observed.”

If there are photos of the initial walk, children can review what plants and animals were observed. They can also refer to their science notebooks. Use the initial list to remind students of what they saw and how they described it. Continue adding to the Observation list until everyone’s ideas are recorded.

Move on to the “W,” asking students what they have wondered about as they walked and noticed plants and animals. Record all ideas and questions, and support and guide children to wonder about what they have seen, heard, felt, and noticed. Encourage every student to have at least one question they are wondering about. Many of the questions may be similar, and the children with similar questions could work together to start talking about their ideas. How will we find out that information? Where could we go to ask?

In a new science notebook entry, have children draw a picture and write about their wonderings.

Evaluation
Listen to the students’ ideas and wonderings to begin to get an idea of misconceptions and/or questions that can be used for inquiry lessons during the unit.

This initial activity can be used as a pre-assessment. Use the attitude checklist to note beginning attitudes of science learning and outdoor awareness. Also, note which students are engaged, using senses and vocabulary, and which students will need more support for focused attention and ways to participate. As another optional pre-assessment, you may wish to use an initial science notebook entry to document beginning awareness of local environment, before the unit begins.

Labels, details, and standard data (date, weather, temperature) should be a part of each science notebook entry.


Activity 1B: One Small Square

(1-2 class periods)

Focus Question: What’s happening in one small square near or in the water?

Engagement (10-25 minutes):
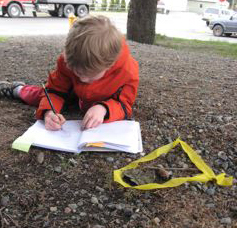
one small square Introduce the book One Small Square Backyard and notice the border on the cover (See alernative titles in the Materials section that may match your local environment better.)  Choose a few pages of the book that best match your local “backyard” to read aloud. Ask the students what they notice inside the border on the cover. Tell students they will be exploring “one small square” of their school yard. Show them a meter of survey tape and a magnifying glass, and model the use of each. Make a square with the survey tape, and tell students this square of space is called a “plot.” You might use classroom materials (legos, beads, pattern blocks) in the square and describe aloud as you look and wonder! Tell students they will have to look very closely in their plot to discover all the things living--both plants and animals.

If needed, have students practice in the classroom using the survey ribbon and defining the “space.” For practice, discuss the details of what is within their spaces, using ordinary classroom items. The goal is to go from looking at the bigger picture of the environment to zeroing in on one small square and to realize that there are many plants and probably animals within that small space.

Exploration (20 minutes):
Give each student a meter of survey tape, a magnifying glass, toothpick flags, and their science notebook. As a class, walk to an appropriate place that you have selected and have students look for a space they want to explore. Describe boundaries so that you can keep the group of children within eyesight. When each student has found their plot, they define the “one small square” with the survey ribbon. Then they study the plot closely for signs of life and other unique features, marking five things that they find most interesting with toothpick flags. Tell students to place the toothpicks carefully so they do not accidently “pin” or “spear” living plants and animals. After students have examined their one small square of earth and used their five flags, encourage them to record three or more of their discoveries in their science notebook.

Explanation (20 minutes):
Have your science explorers invite one another to their one small square to view their discoveries and unique features. You may want to have student pairs set up ahead of time for sharing. As children are exploring and sharing, take a tour of each student’s one small square and ask questions to encourage thinking. Document each small square with a camera if feasible.

Back in the classroom, encourage students to pair up and share three or more things they discovered in their one small square. What is similar in both squares? What is different? How are they related?

Elaboration (10-15 Minutes):
As homework, have students take home a one-meter length of survey tape to do the same assignment in their own backyard. Ask them to bring back documentation of what they found. Post their drawings and writings in the classroom and use them to talk about similarities and differences in backyard environments.

Evaluation:
Observe and identify students’ abilities to “see” findings in the one small square and to use their science notebooks to explain what they saw. You may also ask students to reflect on their findings in their notebooks or out loud.


Activity 1C: Biologist and Subsistence Backpacks

(2 class periods plus exploration time at learning centers)

Focus Question: How do scientists and subsistence users discover aquatic plants and animals?

Engagement (20-30 minutes):
Introduce an “outdoor scientist” and a “subsistence food gatherer” one at a time, on the same day or at different times. Dress up in a coat, hat, raingear, rubber boots, and a backpack that contains the appropriate tools. Introduce the contents of a backpack to the children, one item at a time, and have children share their thinking about what each item is for.

Marine Biologist Backpack: Magnifying glass or hand lens, notebook, clipboard/Rite in the Rain paper, pencil, camera, tide book, identification field guide, field guide book (marine or freshwater), measuring tape or ruler, warm clothes, thermometer, maps, aerial photo, sampling jars, first-aid kit, flashlight, water bottle, snack, cell phone or VHF radio).

Introduce the class to the jobs of a biologist or a marine biologist, discussing questions such as “What is a biologist?” “What do they do?” “What about a marine biologist?” “What do they do?”

Seas and Rivers Subsistence and Personal Use Backpack: Tide book, flashlight, pail, gloves, hat, raincoat, piece of net, knife (pretend), fishing pole, berry-picker, map, identification chart, water bottle, snack, cell phone or VHF radio. Discuss subsistence with the students, asking questions such as, “What if we couldn’t buy food at the store?” “Who gets food from the land, sea, or river?” “What are some traditional uses of land, sea, and river plants and animals?” “How have the Alaska Native people taught us about edible plants and animals?” Explain that when a person gets some of their food or craft materials (plants or animals) from land or water, it is called subsistence or personal use.

Exploration (1-2 hours, multiple days):
Create a dramatic play center in an area of the classroom to simulate a beach or riverbank. You might cover the area with butcher paper and paint a simple backdrop of your local outdoor area. Add a few local props--rocks, shells, stuffed river/marine animals, paper-stuffed fish, plants (dried grass or beach grass, etc) along with books, posters, charts, and other resources. Put the Biologist and Subsistence Backpacks in this area.

Give students the opportunity to explore and play with the backpacks in the center, in small groups during Choice or Discovery time.

Later, introduce a Biologist’s Lab and Subsistence Camp center with more specific activities that allow children to use tools and learn about roles.

Explanation:
Notice how the students are using the science tools and guide their understanding with follow-up lessons in the use of magnifying glasses or thermometers. Students can begin to understand how they will use these tools at the beach later.

Having a “debrief” session a few times during the use of the backpacks will encourage deeper understanding and thinking about how they are used. This can be done with the whole group or with smaller groups as the backpacks are being used.

Elaboration (20 minutes):
Compare the role of a biologist and an Alaska Native subsistence user through discussion and use of photos and/or books depicting people in those roles. How are they the same? What tools do they use that are the same? How are they different? How do we learn from each other? What do they learn from each other?
Scientists share their information when they write books and reports. Alaska Natives share their information through stories, legends, learning from their family, and books.

In what other ways are marine plants and animals used?

Evaluation:
Assess children’s understanding of the roles of biologists and subsistence users, and their appropriate use of tools, through ongoing observation.


Activity 1D: Alaska Seas and Watersheds Discovery Centers

Focus Question: What do you notice about ____________?

(The open-ended questions are important for child-guided explorations.)

Engagement:
Take time to notice a particularly interesting shell or rock. Draw children’s attention to it with either an “I Spy” approach or twenty questions with the object in a brown paper bag.

Afterward, introduce Seas and Rivers Discovery Centers one at a time. Encourage children to use the centers appropriately--“explore like a scientist”--“tell other scientists in the room what you find!”
Centers may include:


Keep a tub of books, puzzles, science tools, and commercial games in the classroom where it will be accessible to all of the center users.

Exploration:
Allow children to self-select the center they want to explore, with ample time to explore and discover at their own pace. Center time should be 1 to 1½ hours in duration.

Explanation:
Debrief with students after center time. What did they notice? What kinds of animals are on the bingo game? How can you describe them? How did you use a science tool? How were you a scientist today as you used the tools and discovered.

Elaboration:
Students will learn from each other when they share their ideas. They will get ideas for rediscovery and replay during the next day’s center time. Move and change centers as children lose interest. Centers can continue throughout the Alaska Seas and Watersheds unit of study, to support understanding and child-directed learning.

Evaluation:
Science notebooks can be used with varying choice of focus--looking at a shell, noticing the characteristics of a sea creature (plastic representation), comparison of sand or rocks. Observation and anecdotal notes are another form of assessment that guides student learning. A checklist can also be used for assessment.


Teacher Preparation:

Tips from Teachers

If you do not have plant and animal life nearby for students to observe, you might consider one or more of the following to allow for close observation:

- Create a mini-biosphere in your classroom.
- Provide books with close-up photos of the beach or water and ask students to make note of what they see.
- Show a video or movie with footage of a beach, pond or underwater environment.
- Consider a walk to a nearby area if your playground does not have any signs of life.

Explore the area around your school to find a route for the walk and a place for the “one small square” activity. An area with plants and animals (even grass and worms or insects) will make the activity much more interesting than a plot of playground that has few signs of life.

  • Prepare science notebooks for student use, and make a blank O-W-L Chart.
  • Measure tape and gather the other materials needed, and assemble student kits. Prepare additional tape and instructions for homework.
  • Gather materials and assemble backpacks.
  • Prepare Backpack centers.
  • Collect materials and prepare classroom centers.
  • Read Teacher Background for more information.

Curricular Connections:

To connect this investigation to art and social studies, students can draw a map of the school area, adding names of things that they saw on their initial walk, and using photos or drawings to document what they saw.
Math learning can be connected to the “one small square” by having students investigate beginning concepts of area, and estimating “How much is everyone’s small square altogether?”
Literacy is reinforced through the writing and drawing activities in the investigation, and children can learn about drama through role-playing activities.


Materials Needed for Investigation 1:

Student Handouts

Science notebooks

Items for Group Display

O-W-L Chart: Large piece of chart paper labeled with columns

Book: One Small Square Backyard by Donald M. Silver and Patricia Wynne, McGraw Hill, 1997. Alternatives (depending on local enviroment): One Small Square Seashore, One Small Square Arctic Tundra.

Material Items
  • Student kits: Surveyor’s tape, magnifying glass, science notebook, pencil, toothpick flags
  • Biologist backpack: clipboard, notebook, pencil, magnifying glass or hand lens, tide book, field guide, ruler or measuring tape, camera, map, warm clothes (hat, gloves), thermometer, maps, aerial photo, sampling jars, first-aid kit, flashlight, water bottle, snack, cell phone or VHF radio
  • Subsistence backpack: tide book, flashlight, pail, gloves, hat, raincoat, piece of net, knife (pretend), fishing pole, berry-picker, map, identification chart, water bottle, snack, cell phone or VHF radio
  • Shells
  • Sand
  • Water
  • Plastic marine animals
  • Plankton nets
  • Magnetic board with pictures of aquatic animals
  • Flannel board with cutouts of aquatic animals
  • Collection of books, puzzles, old calendars, commercial games
  • Pan balance
  • Measuring tools
  • Magnifiers
  • Photos
  • Posters
  • Puppets
  • Soft sculpture animals--clams, sea stars, scallops
  • Bingo games and cards (Sample and instructions Image)
  • Freshwater Bingo boards and cards Image
  • Marine Bingo boards and cards Image
  • Learning Centers checklist Image
  • Attitude Checklist Image
Facility/Equipment Requirements

Outdoor area near school
Sand table


Alaska Science Grade Level Expectations Addressed:

In Investigation 1, First Grade students begin to build toward these K-12 Alaska Science Standards:

Science as Inquiry and Process

(A1) develop an understanding of the processes of science used to investigate problems, design and conduct repeatable scientific investigations, and defend scientific arguments.

(A2) develop an understanding that the processes of science require integrity, logical reasoning, skepticism, openness, communication, and peer review.

Concepts of Life Science

(C2) develop an understanding of the structure, function, behavior, development, life cycles, and diversity of living organisms.

History and Nature of Science

(G2) develop an understanding that the advancement of scientific knowledge embraces innovation and requires empirical evidence, repeatable investigations, logical arguments, and critical review in striving for the best possible explanations of the natural world.

(G3) develop an understanding that scientific knowledge is ongoing and subject to change as new evidence becomes available through experimental and/or observational confirmation(s).

(G4) develop an understanding that advancements in science depend on curiosity, creativity, imagination, and a broad knowledge base.


Essential Question:

  • What kinds of plants and animals live in or near the water?

Enduring Understandings:

  • Plants and animals can be sorted into groups based on different characteristics.

  • People use the plants and animals of the seas and rivers in different ways.

Ocean Literacy Principles Addressed:

  • The ocean supports a great diversity of life and ecosystems.

  • The ocean and humans are inextricably linked.

Class Time Required

Activity 2A - 1 class period (plus 1 period for extension
Activity 2B - 3 30-minute class periods
Activty 2C - 2-6 class periods (plus 2-3 day extension
Activity 2D - 2-3 class periods
Activity 2E - 1 50-60 minute class period 

Materials Needed For extensions:
Teacher Preparation Collect and organize materials
Prepare science notebooks
Create templates for class charts on chart paper in advance
Create a template for Class “Creature Feature” book pages.
Prior Student Knowledge

Students should be able to take turns and listen to one another. They should have experience using describing words. Prior sorting opportunities would be helpful. They should know or learn how to write “clues” without giving too much information.

Vocabulary

characteristics, color, comparison, crustacean, describe, details, echinoderm,  estimate , features, invertebrate, length, measurement, mollusk, size, shape, sort, texture, venn diagram, weight
Words for specific animal parts: antennae, claws, jaws, legs, pincers etc.

Science GLEs Addressed

K-12 Standards A2, C2, G4

Investigation 2Overview: In this 8-11 day investigation, children begin to identify features of specific plants and animals, and to sort them into groups. They describe properties of shells or other objects, and use those characteristics to sort them in various ways. They focus on specific animals and practice observing and describing their characteristics, and are introduced to groups of invertebrates that are sorted according to their features. To review and reinforce what they have learned, the students play a board game that also helps them practice math skills.

Focus Questions:

  • What characteristics of shells can we notice?
  • How can we group shells by their properties?
  • What are the unique characteristics of the different groups of marine or freshwater invertebrates?
  • What characteristics make this animal unique?
  • What do we know about the characteristics of aquatic plants and animals?

Activity 2A: Shells: Take a Closer Look

Focus Question: What characteristics of shells can we notice?

Engagement (10 minutes):
Show one shell to the students, and have them use as many describing words as they can to tell about that shell. Show another shell and ask: “How are they different?” “How are they the same?”
Next, show the students a shell collection with a larger variety of shells. The collection should include univalve and bivalve shells. Ask children: What do you know about shells? Record their ideas on a chart. Read the book Seashells by the Seashore by Marianne Berkes.


Exploration (15 minutes plus time to choose shells):
Give students the opportunity to touch and look at the large assortment of shells. (There should be enough shells so that all children have choices). Tell them to choose one shell they would like to “take a closer look at.” Give the students time to choose their special shell. The shells could be at center during “choice time” (see Investigation 1 ) or displayed in a basket so children can take time to notice unique characteristics. 

When all the students have selected a shell for this activity, ask students to carefully observe and draw their shell in their science notebook. Encourage students to label and describe their shell on the shell observation page. This page can be glued into the science notebooks. 


Explanation (15 minutes):
When students are finished drawing and writing observations, collect all the shells and place them in a group so all students can see them. Then ask for a volunteer’s science notebook. Read the student’s drawing and description, and ask the other children to try to locate that student’s shell. Use this as a model and then have students break into small groups. Repeat this activity with several small groups of students or have students work with a partner and find one another’s shell.


Elaboration (10-20 minutes):
Gather students together once again. Compare success of using science notebooks and information. Have students find their own shell and add information to their science notebook for more details. Ask: How could you describe your shell in more detail or with more information? What are some things that make your shell different? What are some questions you have about your shell? Give students the opportunity to draw another shell with more detail. They will now have learned from the activity as well as from their peers about what is important in the drawing and description.


Evaluation:
Use the children’s science notebooks to evaluate their success in describing shells. 


Extension:
Learn and practice math skills while observing shells further in the Measuring Shells activity.


Activity 2B: Sorting Shells

Focus Question: How can we group shells by their properties?

Engagement (10-15 minutes): 
Ask students to think about the shell they picked earlier to sketch and describe in their science notebooks. Using the same shell, students will choose one word to describe it. Have a chart ready with the heading
"Shells can be . . .". This shell property chart will have five columns labeled at the top: color, shape, size, texture, and weight. Show the chart to the children and ask them to think of ways they described their shells. For example: Shells can be . . . smooth, white, rough, blue, round, oval, bumpy, small, big, heavy, etc. Use the students’ words to fill in the chart.

Exploration (15-20 minutes)
Place the shell collection where everyone can see it. Make two circles with the yarn loops. Tell students you are going to play a sorting game with the shells. Decide together on two properties, one for each circle. For example, the properties chosen might be “white” and “rough.”

Start the game with three shells for examples. Begin by selecting one shell to look at closely. Place it in a yarn circle based on a specific characteristic (for example, white). Hold up the next shell while talking out loud about its characteristics and where you will place it (for example, rough). Continue with the last example shell, using an example that could have both characteristics (it might be rough but is also white). Students will choose where to put that shell. Some students may be ready to consider more than one attribute at a time, and if this is the case you may want to move the yarn and create a Venn diagram. Venn Diagram example. You could also show a shell that is neither white nor rough, and see what students want to do with it.

Encourage each student to place their “own” shell based on the main characteristic of white or rough. After all the shells have been sorted, hold up one last shell and ask the group to point where that shell belongs (in which group).

Explanation (20-30 minutes)
When all the shells have been sorted, ask students: What did you notice about the shells in this group? How are they all alike? How are they different? How about the other group? Encourage students to talk about new ways the shells can be sorted. Using the shell property word chart, have students describe new yarn loop groups they could create for different characteristics. Introduce the idea of overlapping yarn loops (Venn diagram) now, if it was not considered previously. Encourage students in the use of the Venn diagram as they continue to try new ways to sort shells. Create a classroom center where children can continue to practice sorting.

Elaboration (30 minutes)
After children have had experiences with sorting and thinking about different ways to describe their shells, they can solve problems using strategies for sorting.For example: Sally had 12 shells in her collection. How could Sally sort her shells three or more different ways?

Have children draw on a piece of paper, using pictures, diagrams, and words to describe their thinking. After children have finished their work, come back together as a whole group and share thinking. Children will learn from each other as they listen to different ideas.

Evaluation
Use the Shell Sort Levels of Understanding Continuum to assess students’ ability to sort.


Activity 2C: Let’s Meet the Invertebrates

Focus Question: What are the unique characteristics of the different groups of marine (or freshwater) invertebrates?

Engagement (10-20 minutes per day for 2-5 days)
Tell your students they are going to “meet” some interesting animals with unique features that live in the ocean or freshwater lakes/ponds. Scientists group these animals together because they have similar features. Choose 3-5 groups of invertebrates (crustaceans, mollusks, echinoderms, worms, sponges, etc.), and introduce 1 or 2 groups each day. Describe some of the unique features of each group; then list some of the animal species in the group. If you can find or make appropriate puppets, use them to “talk” with your students. For example, an octopus puppet could tell all about the mollusk group. See the Teacher Background Information for information about marine and freshwater invertebrates.

Exploration
Make a large class chart with the title: "Meet the Invertebrates" . Each category of invertebrate will have a column with labels of "what, who, how, where, and traditional use". When you’ve finished introducing the invertebrate and describing each group’s unique characteristics as a class, fill in the chart.

Explanation (15-20 minutes)
When the invertebrates have been introduced, and the chart has been created with the students, have the students divide into groups and draw detailed pictures to add to the chart. Each group will draw one species from their assigned category (mollusk, echinoderm, crustacean, etc.) that is most applicable to the local area. Students will cut out their drawing and add it to the class chart (Meet the Invertebrates).

Elaboration
(15-20 minutes)
Have students take a closer look at one animal within a category of invertebrates and use their science notebook to draw it and/or write their observations.  They will use field guides, posters, and books for detailed pictures of each invertebrate. Drawings might be detailed sketches with labels of specific features.

Extension (2-3 days)
 Introduce and play the Dice Toss game to learn about statistics and probability to reinforce theiranimaldice knowledge of invertebrate species.

Evaluation
Before students begin their science notebook entries, create a checklist with them to make sure they include everything needed in the science notebook entry—title, picture, label, etc. Use the list that they made to evaluate their work.


Activity 2D: Creature Features Class Book

Focus Question: What characteristics make this animal unique?

Engagement (20 minutes)
Read the book Creature Features. Stop after each box of information and ask students to make a prediction. Students will make predictions and defend their thinking about why they chose a specific creature. What is the evidence? The goal is for students to share their thinking with the whole group.

Ask the students: “What creatures do we know about from our local aquatic environment?” Tell them that they will each write and draw one page for a “Creature Features” class book. Make a list of potential creatures for the class book. Use the invertebrates that you learned about in the previous lessons and other aquatic creatures that your students have studied.

Exploration (20-25 minutes)
Guide the students as they re-read the book. Ask: "What creature would you choose?" This writer chose a ______. Which kind of animal could we choose to write about from our own aquatic environment? Model one page with the whole group, using the following framework:

In this tide pool I found a creature. Guess what it is by checking each feature.
How many legs (arms)? _______
What’s its shape? ________
How does it feel? _______
What does it look like? __________
It must be a ______.
Now that you know I’m letting it go!

You may want to adapt this framework for the local environment. Some creatures may not “match” this frame. Encourage students to add additional questions if their creature does not fit these questions.

Here are examples for marine and freshwater invertebrates:

In this tide pool I found a creature.
Guess what it is by checking each feature.
How many legs?
5 pairs of front legs for walking
5 pairs of swimming legs
How does it feel?
It has a stiff exoskeleton
What’s its shape?
Flattened from side to side with a tail fan
Something special about it!
It can walk or swim!
It must be a . . . shrimp!
Now that you know I’m letting it go!

In this pond I found a creature.
Guess what it is by checking each feature.
How many legs?
6 legs—two long legs paddle like oars
What’s its color?
Brown or green
How many body parts?
Three
What does it eat?
Tadpoles, small fish, and aquatic insects
Something special I’d like to share!
It swims upside-down and carries a bubble of air.
It must be . . . a water boatman
Now that you know I’m letting it go!

Show students the class list, and have each student select a creature they want to use. Ask them to write a “creature features” description about it.

Explanation (10-40 minutes)
After students have filled in their frame and drawn a picture with details, they will share their page with another student. Once everyone is done, gather the class together and allow each student to share their page. Or, the teacher may choose to put the book together and then share the book as a class.

Elaboration (30-40 minutes)
Create another audience for your students. You might invite another class in for a reading of the class book, or go into another classroom to share your work. Invite the audience to make predictions and/or share additional questions with the writers.

Evaluation
Check each student's page to be sure it has all the necessary framework information.


Activity 2E: “What Do You Know” Game

Focus Question: What do we know about the characteristics of plants and animals?

Engagement (15-20 minutes)
Introduce the game board for the “What Do You Know” game by asking some questions: What animals eat fish? What plant grows in the water? Where would you find a whale? These questions are to raise the idea of having more than one answer for a question. The game supports and integrates local plant and animal characteristics and helps children practice addition.

Show students the game board, and together name the animals and plants and follow the path of numbers on the board. Explain the rules of rolling the dice, adding the two numbers and then move that many spaces. Players pick up a card on each roll where they land on a picture and follow the information on the card. The goal is for students to discuss the information that has more than one answer. For example, “go to the space that has an animal that eats fish” could be a seal, eagle, or bear!

Exploration (30 minutes)
This game is for 3 to 4 students to play. Either make enough game boards so everyone can play the game in small groups or use this game during “math games” time or center activities. Children will play until the first one gets to 100. Let children decide how to end the game. (Does a player need the exact number? Or can they land on 100 with an “over” number.) The instruction cards are intended to initiate a discussion about marine/river animals and plants in an aquatic environment.

Explanation (10 minutes)
The debrief could happen in a small group of students who were playing or bring it back to the big group and have everyone discuss the ideas that have more than one “right” answer. Students will share something they learned while playing the game.

Elaboration (5-15 minutes)
Use math story problems to solve addition problems. Extend the idea of using concepts of animals to solve number problems by using addition story problems about aquatic animals.

Evaluation
Observe children as they play the game—encourage sharing of ideas, taking turns, and strategies. Support those students who need more experience and/or information with animals and plants on the game board. Math story problems can be adjusted with a variety of numbers to best match the needs of the class.


Teacher Preparation:

Tips from Teachers

No tips are currently available.

  • Collect and organize materials.
  • Prepare science notebooks.
  • Create templates for class charts on chart paper in advance.
  • Create a template for class “Creature Features” book pages.
  • Read Teacher Background for more information.

Substitutions: In Activity A, shells of marine or freshwater animals can be collected, borrowed, or purchased. Those collected from nearby beaches are best. If shells are not available, substitute buttons, pattern blocks, pressed or fresh plants, bones or animal parts (teeth, beaks, tusks, etc.) or rocks in the sorting activities.

It will be helpful to have a list of local aquatic creatures, or a book that assists children in starting to know what is in their local environment. Posters, charts, and field guides are also useful as resources.


Curricular Connections:

Connections to Math content including Venn diagrams, measuring, graphing, probability and statistics, and computation are included in many of the activities and extensions.

Opportunities to read and write about animal and plant characteristics provide literacy connections.

Art and culture
are connected through the use of traditional Alaska Native designs of plants and animals and use of Alaska Native languages to name and label animals.


Materials Needed for Investigation 2:  

Student Handouts

Science notebooks

Shell observation page Image

Items for Group Display

Book: Seashells by the Seashore by Marianne Berkes. Dawn Publications, California, 2002, ISBN 978-1584690344

Book: Creature Features (need more info)

Shell Property Chart Image

Chart Paper

Yarn Loops (about 1 yard long)

Material Items

For extensions:

  • Graph or grid paper, 2 inch x 1/2 inch
  • Unifix cubes or wood block cubes for measuring length
  • Dried lima beans and kidney beans
  • Animal dice for Dice Toss Game Image
Facility/Equipment Requirements 

Ordinary classroom facilities


Alaska Science Grade Level Expectations Addressed:

Standards Addressed

In Investigation 2, First Grade students begin to build toward these K-12 Alaska Science Standards:

Science as Inquiry and Process

(A2) develop an understanding that the processes of science require integrity, logical reasoning, skepticism, openness, communication, and peer review.

Concepts of Life Science

(C2) develop an understanding of the structure, function, behavior, development, life cycles, and diversity of living organisms.

History and Nature of Science
(G4) develop an understanding that advancements in science depend on curiosity, creativity, imagination, and a broad knowledge base.

Essential Question:

  • What kinds of plants and animals live in or near the water?

Enduring Understandings:

  • Plants and animals can be sorted into groups based on different characteristics.
  • People use the plants and animals of the seas and rivers in different ways.
Class Time Required

Activity 3A: 1-2 class periods
Activity 3B: 5-6 class periods
Activity 3C: 1 class period
Activity 3D: 1 class period
Activity 3E: 1-2 class periods

Materials Needed
  • Alphabet books to share with children for models
  • 12 X 18 pieces of paper
  • laminator
  • spiral binding or 3 rings
  • drawing and coloring materials (colored pencils, crayons)
  • Books, field guides and/or posters showing local marine/aquatic plants and animals
  • Science notebooks
  • High Tide, Low Tide glue-in Image
  • Large rolls or sheets of paper (variety of colors) and newsprint or newspaper
  • Staplers, scissors, markers
  • Room to manipulate tools and paper
  • Construction paper
  • Template and directions for the wheel book
  • Brads
  • Tag board and circle template
  • “Everything Grows” book and/or song
  • Life-cycle pictures to cut out Image
  • A book about tides
Teacher Preparation Do research and gather information about local marine/aquatic plants and animals.
Acquire and organize books and materials. Make up examples of a large animal sculpture, a wheel book, and a riddle to show students.
Prior Student Knowledge

Students should know the ABCs, and have some prior experience with a class research project. They should be able to work with large paper and use tools for cutting and stapling. They will need to know how to use a paper fastener (brad).

Vocabulary

adult, answer, clues, cut, details, developing, draw, information, larva, life cycle, paint, research, riddle,staple, stuff, tide

Names of local plants and animals and their features. 

Science GLEs Addressed

A1, A2, C2, G3

Investigation 3Overview: In this 9-12 day investigation, children begin by continuing to learn about the wide variety of aquatic plants and animals in their region. Each child then chooses a special plant or animal to research, depict, and share with the class. They go on to learn more about their special species and others as they explore life cycles and tide-related behaviors, and end the investigation by making and sharing plant and animal riddles. 

Activity 3A: ABC Sea/River Book 

(1-2 class periods)

Focus Question: How do we show what we know about a plant or animal? 

Engagement (15 - 20 minutes):
Read The Ocean Alphabet Book (or another alphabet book that best matches your local environment.) Brainstorm local aquatic plants and animals that students can include in their class book. Emphasize the use of the beginning sound, and make a list of animals or plants by each letter. Children can choose which plant or animal to describe on their page.

Exploration (20 minutes):
Use large, 12 x 18 sheets of paper that can be laminated, spiral bound, or fastened together with three rings. Provide drawing, writing, and coloring materials, and ask students to draw their plants or animals, paying attention to details. Have them include the upper case letter, the lower case letter, and a sentence (or more) about the plant or animal (provide scaffolding with a sentence frame). Those who get done early can make another page. Observe children as they make their pages, encouraging details and interesting information. Remind children that many people will use the book and they will want to do their best!

Explanation (30-40 minutes, or spread out over several days)
Have each student share their page, naming their animal or plant and reading and telling what they know about it and how it is used. Students can ask each other questions and the teacher can encourage discussion of plants and animals.

Elaboration (20-30 minutes):
Provide “mini-books or paper, and drawing materials for students to make alphabet books of their own.

Evaluation
Observe children’s success with the activity, using notes or a checklist to record their ability to notice details, their knowledge of local plants and animals, and their communication skills.


Activity 3B: Plant or Animal Research 

(5-6 class periods)

Focus Question: How can we find out more about one creature?

Engagement (20-30 minutes):
Read a nonfiction book about a local sea or freshwater creature. Model your enthusiasm and excitement for learning about a local animal. Then, take time to brainstorm marine and aquatic animals that the class might observe on their upcoming field trip to the beach, river or lake. Ask children to think about an animal they would like to research. They will become the class expert on that animal, and after they complete their research they will teach their classmates about the animal. On a class list, record the animal each student has chosen. Remind students that scientists learn by reading, writing, and researching about information that is interesting and useful to them.

Exploration (30-minutes):
Display a large variety of books, posters, and other visual images in the classroom. Students will use the books and posters, the Internet, guest biologists, and local knowledge to research their local marine or aquatic animal. Include questions for research on glue-in organizers for the students’ science notebooks, which may include the following:
•    Name of animal.
•    What does it eat?
•    Where does it live?
•    How does it move?
•    How does it get food?
•    How does it protect itself?
•    Something it does that few other animals can do.
•    Use five words to describe it.
•    Tell who uses it and how it is used.

Explanation (One or more 30-minute sessions):
Ask each student to draw a picture of their animal in their science notebook. They will organize their information from resources to document their thinking and create a research area in the science notebook that they can later share with others. To prepare for sharing information, children might also make a small puppet on a brown paper bag to show a visual image of the animal.
Structure the order of student presentations so that animals from the same group (mammals, invertebrates, etc.) are together. After a group of researchers have presented information encourage children to talk about how these animals are connected. What characteristics, similarities, or differences help us to classify them? Refer back to the class chart from Investigation 2C and expand it or make a new one to include marine mammals, fish, and other kinds of animals presented. Support children to make connections to prior experiences, use of resources and their own information that they’ve gathered.

Elaboration (Two or 3 30-40 minute sessions):
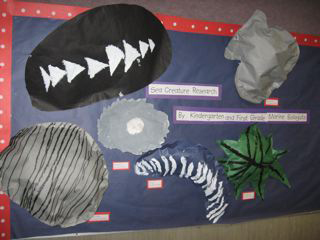
Tell students about the culminating celebration and choose one child to describe their particular creature. Then, with the whole class participating, help that child to imagine and describe how they would make a large size paper sculpture of the animal. Discuss the idea with students – “if I was to make this creature, what would I need? How would I begin?”
 
Model the creation of the sculpture. paper sculpture
Use large paper and a picture to support observational drawing.
One step at a time, show students how to:
1. Draw the form of the animal.
2. Cut out the animal on the lines.
3. Staple paper so there are two sides together, with just a couple of staples.
4. Paint or use markers to draw details (eyes, gills, fins, wings, etc.).
5. Staple carefully all around, leaving one gap to stuff the creature.
6. Stuff by putting newsprint into the gap, then staple it closed.

Have students spread out in the room, or have students work in teams to create one sculpture per small group at a time. Students will use the information from their marine/aquatic animal research to create the sculpture. Encourage children to talk about the specific characteristics of their animal; number of legs, shape of body, use of appendages, etc. The plan that students make is important since this will be the information that is used to inform guests and others of research.

Students will present the finished sculpture first to the class or in small groups. Students can describe the process and how they decided what details to include. This is practice for the information they will give to visitors, guests and scientists that come for the final celebration! Discuss how the sculptures are similar to the real animal or plant, and how they are different. What new details did students learn about their animal or plant as they made their sculptures?

Hang the sculptures with fishing line, make them into a mobiles, or just use them to display the forms of creatures for others to see. Students will explain their research and visual details of their creature to guest, family members and others.

Evaluation:
Evaluate through observations of student work and science notebooks, and use a child-created rubric for evaluation of sculpture and presentation of information.


Activity 3C: Life Cycle Wheels

(1 class period)

Focus Question: What is the life cycle of local plants and animals?

Engagement (10-15 minutes):
Sing the song “Everything Grows” by Raffi or read the book by the same title. Ask students what they know about the local animals and how they grow and change. Tell students that all animals have a life cycle. Show the class a Life Cycle Wheel of a local aquatic animal, and ask “What do you notice as the wheel turns?” Have a discussion about what the children notice. Explain that they will get to make their own wheel that shows the life cycle of an animal!

Exploration (15-20 minutes):
Select five options that children can choose for their “wheel book” (fish, crab, snail, clam, mosquito, aquatic insect, urchin, etc). They will cut out the pictures of the developing stages (from egg to adult) and paste them onto the wheel, color the inside of the wheel, and decorate the outside of the folded life cycle wheel book. Give children books to look at and other resources to encourage them to think about the animal’s habitat and about how they will decorate the outside of their wheel book. Life Cycle Stages examples.

Explanation (15 - 20 minutes):
Children will share their wheel books with each other as they finish. Groups of children can then share in the large group as you guide the discussion of the life cycle of each animal. Help children notice similarities between animals – and differences, too. Can they think of other life cycles not used within these wheels?

Elaboration:
As homework, have children take their wheel book home and explain it to their families. Together can they come up with a different animal, or a plant, and draw the life cycle at home. They might do the life cycle of the animal that they researched in the previous activity. It might be useful to have a blank form or a circle cut-out that they can take home.

Evaluation:
Listen as children describe their animal’s life cycle. Are they in the correct sequence? Can they describe how a creature develops? What features of the animal make it unique as it grows and changes? What kind of connections to other life cycles can they make?


Activity 3D: High-Tide, Low-Tide Game 

(1 class period)

Focus Question: What different things do marine animals do at high tide and at low tide?

Engagement (10 minutes):
Read a book about the tides. Ask students: What do you know about the tide? What do you notice when the tide is high? What do you notice when the tide is low? What do you think happens to tide-pool animals and plants when the tide is high? What do you think happens to plants and animals when the tide is low or out?

Exploration (10 minutes):
Tell your students: We are going to play a game called: High-tide, Low-tide.
I’ll say the name of an animal that lives near the tide line. It will be an animal that spends some of its life exposed at low-tide and some of its life covered with water, at high-tide. To begin with I’ll describe how the animal moves and feeds at high-tide. Then I’ll describe how the animal protects itself and behaves at low-tide.

Here’s an example: A Barnacle. You are a barnacle. You have glued your shell to a rock and you sit upside down in your shell house. Each shell house is made of six hard, crusty, plates. When the tide is high the barnacle opens its movable shell plates and throws out its curled, feathery legs. It uses its curled feathery legs to sweep the sea soup for tiny plants and tiny animals and kick them down into their mouths. At low-tide the barnacles show no movement or sign of life. The six hard, crusty shell plates close up tight. The barnacle’s shell makes a moist house and keeps the animal cool. The barnacle sits upside-down in its cool shell house with its head cemented to the bottom and its long feathery legs curled up tight.

When I say: high-tide show how a barnacle behaves at high tide. When I say: low-tide show what a barnacle does when the tide is low.

Here’s another example: A Limpet. At high-tide the limpet moves about scraping and scraping the rocks with its tongue. A limpet tongue is like a long ribbon covered with very fine teeth. The limpet creeps along scraping and eating on the thin layer of tiny green plants that covers the rocks. At low-tide, a limpet out of seawater does not scrape the rocks for tiny green plants. It pulls its head and the two long feelers inside its cone-shaped shell house. With its wide muscular foot it plasters itself to the rock with very tight suction. The limpet’s cone-shaped shell protects it from hungry crab, sea stars and shore birds and it makes a moist pocket for the animal inside its shell.

When I say: high-tide show how a limpet behaves at high tide. When I say: low-tide show what a limpet does when the tide is low. “

Explanation (10-20 minutes):
After students have acted out the examples, ask them to think about the marine animals and plants that they’ve learned about and what they would be doing at high tide and low tide. What are their unique ways of ‘eating and moving’? Ask students to share what they know, and allow them to do more research if needed. Have each child draw a picture of a plant or animal at high tide and at low tide, in their science notebook, using the High Tide, Low Tide glue-in.

Elaboration (10-20 minutes):
Invite students to ‘teach’ and lead this game. Allow a student to be the leader and describe how their animal behaves at low-tide and high-tide, while other students act it out.

Evaluation
Observe the students’ work in their science notebooks and their actions during the activity.


Activity 3E: Marine/Freshwater Animal or Plant Riddle 

(1-2 class periods)
Focus Question: How do we identify animals based on their characteristics?

Engagement (10-15 minutes):
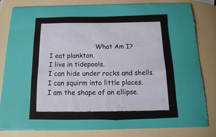
Read an animal riddle to the class.riddle image
For example:
I float near the surface of the water.
I eat zooplankton and fish.
I’m eaten by fish, sea turtles.
I have sticky stuff on my tentacles that captures and paralyzes prey.
I defend myself with stinging cells on my tentacles.
What am I? (Jellyfish)
Continue reading a few more examples until children begin to get ideas for their own riddles. Encourage children to share their riddle ideas, helping them to understand that the clues are important.

Exploration (10-20 minutes):
Students will use the information from their marine/aquatic animal research or from another student to write a riddle, using the frame in their science notebook. Ask children to read their riddles to their classmates. Encourage children to use all of the information that they’ve learned as they read and write riddles.

Explanation (30 minutes):
Prepare riddles for a display so other students and guests to the school can learn about each animal. Encourage students to make an attractive ‘border’ around their clues. The border should include small pictures illustrating the clues in the riddle. (For example, they could have pictures of plankton, fish, and water for the jellyfish riddle). Each student will also draw a detailed sketch of their animal.

The riddles can be displayed in the hall – having the written clues on the top page with the answer and a picture on another page underneath. Invite other students and teachers to read the riddles and guess the animal. Students play the role of scientist and feel empowered when they notice other people enjoying learning from their animal riddles.

Elaboration:
At the final Alaska Seas and Watersheds Celebration students will invite others to read and puzzle over their riddles. Tour guides can be used to show how to make a prediction and then lift up the flap to check their thinking! Students can be encouraged to continue making riddle books to display in the hall, especially after they have had their field session and might have more clues to add.

Evaluation:
Use a checklist to help students evaluate their own riddles.
Does my riddle make sense? Are there enough clues to help others solve it?


Teacher Preparation:

Tips from Teachers

Sybil VanDerhoff created this ABC book template. Thanks Sybil!

Use a "research guide" to focus the class research leading up to the riddles and the sculptures. On a large piece of paper for students to use, give prompts for research like "size", "color", etc.

Read through the investigation and the Teacher Background section. Do research and gather information about local marine/aquatic plants and animals.
Acquire and organize books and materials. Make up examples of a large animal sculpture , a wheel book , and a riddle to show students.


Curricular Connections:

Activities in this investigation connect to literacy, reading, and writing as students listen to books, make a book, do research, and write riddles. They also develop language arts skills as they present information and speak. There are many opportunities for students to learn about art through drawing and sculpture-making activities. Spatial skills and a sequencing activity enhance math skills. As they act out animals at high and low tide they gain experience in movement (PE) and drama. In addition, this investigation gives students many opportunities to learn and practice collaboration and teamwork skills. 


Materials Needed for Investigation 3:  

Student Handouts

Science notebooks

Science notebook glue-ins for:

Items for Group Display

The Ocean Alphabet Book, and/or other alphabet books

Everything Grows book, by Raffi

Everything Grows (album or MP3 download), by Raffi

A book about tides

Life Cycle Wheel (Directions for the wheel book Image)

Material Items
  • 12 x 18 pieces of paper
  • Spiral binding or 3 rings
  • Drawing and coloring materials (colored pencils, crayons)
  • Books, field guides, and/or posters showing local marine/aquatic plants and animals
  • Large rolls or sheets of paper (variety of colors)
  • Newsprint or newspaper
  • Staplers, scissors, markers
  • Construction paper
  • Brads
  • Tagboard and circle template
  • Life cycle pictures to cut out Image
Facility/Equipment Requirements 

Laminator
Space to manipulate tools and large sheets of paper


Alaska Science Grade Level Expectations Addressed:

In Investigation 3, First Grade students begin to build toward these K-12

Science as Inquiry and Process
(A 1) develop an understanding of the processes of science used to investigate problems, design and conduct repeatable scientific investigations, and defend scientific arguments.

(A2) develop an understanding that the processes of science requires integrity, logical reasoning, skepticism, openness, communication, and peer review.

Concepts of Life Science
(C2) develop an understanding of the structure, function, behavior, development, life cycles, and diversity of living organisms.

History and Nature of Science
(G 4) develop an understanding that advancements in science depend on curiosity, creativity, imagination, and a broad knowledge base.

Essential Question:

  • What kinds of plants and animals live in or near the water?

Enduring Understandings:

  • Plants and animals can be sorted into groups based on different characteristics.
  • People use the plants and animals of the seas and rivers in different ways.
Class Time Required

One preparatory class session
1-2 hours field trip
1-2 follow-up class sessions

Materials Needed
  • Science notebooks
  • Close and closer pagesImage
  • Biologist’s backpacks with tools and field equipment
  • Extra clothing
  • Snack
  • Survey tape cut into one-meter lengths
  • Tarp for shelter at field site in case of bad weather
  • 11 X 14 construction paper
  • colored pencils
  • Field guides
  • Identification charts
  • Chart paper
Teacher Preparation Read all materials.
Find and visit the field site.
Arrange permission and transportation.
Invite additional adults.
Gather supplies.
Dress appropriately.
Prior Student Knowledge All prior discussion and research are essential for the field session.
Vocabulary

boundary, claim, data collection, documentation, evidence , field session, identification, safety

Science GLEs Addressed

A1, A2, A3, C2, C3, G3

Investigation 4Overview: This 3-day investigation includes a 1-3 hour field trip. Students make predictions about where they will find plants and animals, and go to a field site to explore and test their predictions. After having time to explore, students conduct a detailed investigation of “one small square” at the field site. Back in the classroom, they share their findings and then make a detailed representation of their research “square” using drawings, notes, and labels.

Focus Question:

  • How can we find the plants and animals of our beach or river environment?


Engagement (1 class period):
Dress for the part and review the uses of the “biologist’s backpack.” Remind children that they will be using the biologist’s backpack and not the subsistence backpack for this field session because they will not be gathering foods to eat. They will be scientists, gathering information and observations to write down and learn from. Explain where the class will be going for the field trip. Ask the students: “How can we find plants and animals in our aquatic environment?” “How do you know what is there?” “What tools can we use?” “What helps us identify different characteristics?”

Ask children what they expect to see on the field trip, and what they might see if they use a magnifying glass to get a closer view. Have them draw and write their predictions in their science notebooks. For the close-up view, they may use a close and closer page that has been glued into their notebook.

Have students share their thinking, drawing, and writing with each other. This can be done in partners, small groups, or in the large group taking turns. After students have shared with each other, brainstorm about where they will look for the plants or animals they have predicted they will see. Encourage students to explain their thinking by asking questions such as: “Why would you look there?” “What do we know about this plant or animal?”
Explain that there will be boundaries set for where they may explore and that those will be pointed out when they arrive at the field site. Have children brainstorm ways to be safe on a field trip. These will include:
•    Have a partner
•    Stay within boundaries
•    Watch where you step
•    Be able to see the “gathering area” from wherever you are


Exploration (1-3 hours):
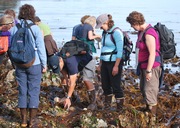
Travel to the field session area by bus, cars, or foot. Review safety rules and boundaries, and allow students to explore for 20-30 minutes. They will use all of their experiences and knowledge from the previous investigations to explore the local area. They will be looking, sharing, and identifying plants and animals.

After the initial exploration, students will gather together for organized exploration. Using science notebooks, survey tape, and possibly cameras, students will make detailed notes and technical drawings on “one small square” in the field area.

You may want to include a comparison with a second field site (e.g. low intertidal and upper intertidal or river bank and river’s edge) to enable students to compare between “squares”. This is a very important concept when learning animal-habitat associations in coastal marine and freshwater environments.


Explanation (20-30minutes):

Back in the classroom, guide a debrief session of the field trip. Ask: “What did we find out?” “How can we share this information?” “How did we gather information?” “What kind of ways can we use this information to inform others?” “What else could be done with this information?” “How will we continue to learn about the local aquatic plants and animals in our area?”

Students can share in a variety of ways. Pairs could be organized to share their findings. Students could first share with one other student, and then find two more partners with whom to share findings OR the whole group could come back together and then pair up.

Make sure that students have an opportunity to share their “one small square” using the science notebook entry, so scientific thinking can be supported. Encourage children to discuss the plants and animals they have found, and their thinking about why they differ from an area another student may have sketched and documented. The goal is to have students share their thinking and understanding of what they have found.


Elaboration (30 minutes):
Students will use the page from their science notebook to create a larger, 11 x 14 page. They will use colored pencils to draw a more detailed example of their “one small square” to share with the audience during the final celebration . As children transfer, draw, and color their entry, encourage them to use field guides and identification charts to label the local plants and animals accurately. If a camera was used to document each small square, photographs may be provided as additional visual information. Children will use their science notebook drawings and notes, adding labels and details of color, shape, size, and texture. Students will share their detailed drawings with each other, first through pair sharing as they finish and later as a whole group in a Scientific Symposium format. Emphasis will be made on similarities of data as well as differences, and a chart can be created to compile the data. Identify the various areas that were used to collect data during the field session, and discuss how the findings changed from one area to the next. What kinds of animals and/or plants were found in each area?

Encourage children to make predictions about what might be found in a different aquatic environment. For example, if the class is from Southeast Alaska and exploring at the beach, have them think about what might be found in a freshwater environment. Focus not on specific naming of plants and animals, but on how the information would be found. What resources could we use to gather that information? In what way would our field session differ? In what way would it stay the same? Emphasize information about how scientists gather information about different environments all over the state.

One way to organize the overall communication part of the unit is to set up a "scientific symposium" for the culmination of the unit. Students can display information, artwork, books, and exhibits from their lessons. Invite parents, community members, and/or other classes to come, view, and listen. All through the unit the teacher should call each discussion and/or investigation of information a “mini-symposium” letting children know that their final information will be shared at the scientific symposium. In this way, children will be expected to offer a piece of science information for the symposium, emphasizing that everyone’s thinking would be important to the whole process.


Gather students together for the scientific symposium. Students will act as groups of “scientists” who will report their findings to the rest of the group. It is fun if the lead educators are quirky reporters during this activity, so that key questions can be asked of the scientists: “How did you come about these findings?” and, to a member of the‘audience’: “How would you have gone about answering this question?” In particular, it is key to prod students to ask and answer their own questions about the data they are collecting and the merits of their methodology.


Evaluation
A science notebook rubric could be used to determine if students have included the date, a picture, labels, words, and best work. Look at student work, and have children evaluate their own work to decide if they have drawn the details of their prediction well enough that another student can identify the plant or animal they expect to see. They can also reflect on their field experience and evaluate the usability and quality of the data they collected.


Teacher Preparation:

Tips from Teachers

If you worry about science notebooks getting wet or dropped into the water, you might have children pick their squares, study them with a magnifying glass and then have a parent helper snap a picture of it. You can then leave the detailed drawing for the classroom using the picture and their memories.

When the large 11" x 14" squares are displayed, ask students to organize them by beach location and/or tide zones.

Read through the investigation, the Teacher Background , and the Field Trip Information.
Explore to determine a suitable site for the field trip to a beach, riverbank, or other aquatic area. Determine the boundaries for the area, possible bathroom facilities, and where you might be able to set up a tarp shelter. Note the plants and animals that you see as you explore the site.

Arrange for permission and transportation for the field trip. Invite and support parent volunteers, guest naturalists and scientists, and Native culture bearers and/or elders to come along on the field session.

Gather supplies needed for the field session: backpacks, buckets, nets, field guides, identification charts, survey tape, and science notebooks. Add extras that match the area where you will be going, such as a tide book. Dress appropriately for your environment and climate conditions.

During the follow-up session, have science notebooks available. Ask some students with detailed drawings to share their entries as a way to model how to add details, labels, and explanations for local plants and animals.


Curricular Connections:
The activities in this investigation support literacy through writing and drawing.
Adding details, line, shape, and shading to drawings helps students develop skills in art.
Physical education can be supported as students walk to and around the field site.
As an added Environmental Education activity, students can use bags to clean up the litter in the field area, and as a social studies activity they could study the traditional use of plants and animals in the field session area.

Materials Needed for Investigation 4:

Student Handouts
Science notebooks
Close and closer pages for notebooks Image
Items for Group Display Chart Paper
Material Items

Biologists Backpacks containing:

  • Magnifying glass or hand lens
  • Notebook, clipboard/Rite in the Rain paper
  • Pencil
  • Camera
  • Tide book
  • Identification charts
  • Field guide books (marine or freshwater)
  • Measuring tape or ruler,
  • Thermometer
  • Maps and/or aerial photo if available
  • Sampling jars
  • First-aid kit
  • Flashlight
  • Cell phone or VHF radio
Extra clothing
Water bottles
Snacks
Survey tape cut into one-meter lengths
11 x 14 construction paper
Colored pencils
Magnifiers
Buckets
Science notebooks
Writing tools (pencils, colored pencils)
Small rulers
Thermometer
Digital camera
Facility/Equipment Requirements

Field site at a beach or riverbank
A tarp for shelter


Alaska Science Grade Level Expectations Addressed:

Standards Addressed

In Investigation 4, First Grade students begin to build toward these K-12 Alaska Science Standards:

Science as Inquiry and Process
(A1) develop an understanding of the processes of science used to investigate problems, design and conduct repeatable scientific investigations, and defend scientific arguments.

(A2) develop an understanding that the processes of science require integrity, logical reasoning, skepticism, openness, communication, and peer review.

(A3) develop an understanding that culture, local knowledge, history, and interaction with the environment contribute to the development of scientific knowledge, and local applications provide opportunity for understanding scientific concepts and global issues.

Concepts of Life Science
(C2) develop an understanding of the structure, function, behavior, development, life cycles, and diversity of living organisms.

(C3) develop an understanding that all organisms are linked to each other and their physical environments through the transfer and transformation of matter and energy.

History and Nature of Science
(G3) develop an understanding that scientific knowledge is ongoing and subject to change as new evidence becomes available through experimental and/or observational confirmation(s).

Essential Question:

  • What kinds of plants and animals live in or near the water?

Enduring Understandings:

  • Plants and animals can be sorted into groups based on different characteristics.

  • People use the plants and animals of the seas and rivers in different ways.

Class Time Required

3-4 class periods plus one all-afternoon or evening session for the Celebration

Materials Needed
  • Science notebooks
  • All materials created during the investigations
  • Paper and art supplies to make invitations and decorations
  • Food, beverages, paper plates, utensils, etc. for Celebration
Teacher Preparation

Organize all of the student work and materials from the unit.

Set dates and invite others to Celebration.

Set up room to facilitate presentations.

Enlist parents and volunteers as needed. 

Prior Student Knowledge

Students will use their experiences, skills, and knowledge from all of the Investigations in the unit. 

Vocabulary

expert, forum, panel

Science GLEs Addressed

A1, A2, C2

Investigation 5Overview: In this investigation, children will reflect on what they have learned as they complete the O-W-L chart that they began in Investigation 1. They will plan ways to share their new knowledge with the whole school and/or community and prepare for an Alaska Seas and Watersheds Celebration. After learning and practicing ways to present information, they will display and present their work to others. The investigation extends over 3 or 4 class periods, and culminates with a long afternoon or evening celebration. 

Focus Question:

  • How do we share information?

Engagement (20-40 minutes):
Review the O-W-L chart from Investigation 1 and have children share their thinking about what they know now. Fill in the “L” of the chart: “What do we now know?” “How did we find out?”

Ask students to brainstorm in their science notebooks, using a “glue in” to draw pictures with simple sentences and labels. (“What I know now” in one box and “what questions I still have” in a second box). Have students pair up and share their entries and thinking with each other, and eventually with the whole group. What are the common things students have learned? Differences? What questions could be part of an extended investigation?

Then, discuss the upcoming Alaska Seas and Watersheds Celebration and ask: “How will we share this information with our families, other students, and community?”


Exploration:
Work with students to create a display of their knowledge. This might include the following.
•    An underwater scene
•    Puppets for a puppet theater
•    Science notebooks
•    Class book
•    Animal sculptures
•    Photos of students working at school and at the field session
•    Songs, poems
•    A play or Readers Theater
Everything they have done in the unit can be on display. Let students plan their celebration, deciding how information will be displayed, what kinds of artistic forms they would like to perform, and how food will be shared. Help students invite parents, other teachers and students, community members, scientists, and Native elders and culture-bearers to the celebration.


Explanation (Half day or a few hours of time split up over several days):
Encourage students to share their processes of finding out information, collecting data, and completing investigations, in addition to sharing their content knowledge. Arrange for students to practice sharing their information, so that they become “experts” and experienced speakers.

Students will share their information by guiding visitors, answering questions, and showing their best work. They may discuss scientific information and answer questions by modeling a scientific panel or forum during their celebration. Students could be given a list of questions to study and visitors could then choose from those questions focused on local plants and animals.


Elaboration:
Ask students to use photos of their work and write brief articles for the school newspaper and/or on the school or the Alaska Seas and Watersheds website.

Students might also share their work by taking their findings to a preschool and/or the Pioneer Home (or other elder care). The first graders would have to consider their audience and plan for speaking to them, giving information and asking for questions.

Encourage students to continue an independent investigation, and consider following up with a science fair or another experience that allows them to share outside of their classroom.


Evaluation:
Observe and evaluate student skills and knowledge as you listen to their discussion and check their science notebooks. Identify their abilities to ask additional questions and/or extend their thinking beyond the current topic of study.

Work with students to create a rubric that sets forth the criteria for excellent presentations.


Teacher Preparation

Tips from Teachers

No tips are currently available.

Read through the materials including the Teacher Background and Celebrating Alaska Seas and Watersheds.
Work with other school staff to schedule the celebration. If it will not be a whole school celebration, invite the other classes to attend practice sessions and/or your event.
Invite guests to the celebration using child-created invitations, announcements in the school newsletter, and/or posters and other community announcements. Enlist parents and volunteers to help with food (fish, shellfish, seaweed, and other local “aquatic foods” if possible!) and supplies such as paper plates and napkins. Check out the Alaska Sea Grant bookstore and the Alaska Seafood Marketing Institute for some recipe books.


Curricular Connections:

The celebration will give students ample opportunities to develop skills in Language Arts as they speak and explain, and act as guides for their guests. Art, drama, and music are also incorporated into the celebration.


Materials Needed for Investigation 5:  

Student Handouts

Science notebooks

Items for Group Display
  • Photos
  • Class ABC book
  • Research results
  • Animal Sculptures
  • Life Cycle Wheels
  • Riddles
  • “Backpacks”
  • Science Notebooks
  • Charts created by class
  • Creature Feature Class Book
  • “What Do You Know” Board game 
Material Items

Art supplies for invitations and decorations

Facility/Equipment Requirements 

Hallway, wall, and other display space.

Gathering space for student presentations with "audience seating."


Alaska Science Grade Level Expectations Addressed:

In Investigation 5, First Grade students begin to build toward these K-12 Alaska Science Standards:

Science as Inquiry and Process
(A1) develop an understanding of the processes of science used to investigate problems, design and conduct repeatable scientific investigations, and defend scientific arguments.

(A2) develop an understanding that the processes of science require integrity, logical reasoning, skepticism, openness, communication, and peer review.

Concepts of Life Science
(C2) develop an understanding of the structure, function, behavior, development, life cycles, and diversity of living organisms.

Essential Question:

  • What kinds of plants and animals live in or near the water?

Enduring Understandings:

  • Plants and animals can be sorted into groups based on different characteristics.

  • People use the plants and animals of the seas and rivers in different ways.

Events and Announcements

Get Your Feet Wet

April 1 - May 31

Celebrate and share your local event with other Alaskan teachers and students! We'll send you and your students a certificate of accomplishment and place them on the Alaska Sea Grant honor roll if they complete a clean-up or other type of stewardship project. xx

Register here

Alaska Seas and Watersheds teaching resources and activity ideas for field trips and stewardship projects are available for all grade levels along with new NGSS-aligned lesson plans and units for field trips and the use of drones and submersibles to collect environmental data.

Coming Soon!

A collection of teaching resources for the Northern Gulf of Alaska Long-Term Ecological Research Project area and a link to resources for teaching about ocean acidification.

Professional Development

Alaska Sea Grant provides professional development in a variety of formats. Onsite in-service presentations and workshops are provided free-of-charge as an opportunity for Alaska K-8 teachers and informal educators to learn about our award-winning, Alaska-relevant curriculum materials and other educational resources.  Graduate-level courses can also be provided for the cost of Continuing Education Credits through the University of Alaska.

More information

Professional development
Tidepooling

Grants to Alaska Schools

Since its beginnings during the 2014–2015 school year, the Alaska Sea Grant school grant program has provided more than $100,000 to 10 Alaska school districts to increase local marine and aquatic education in 22 communities. The three-year, $10,000 grants have supported science curriculum revisions, development of NGSS-aligned lesson plans and units, field trip transportation, and the purchase of equipment and supplies.

If you are an Alaska teacher or administrator, contact us to get on the email list for the next announcement for a Request for Proposals.

anchoragewetlandsStudents explore and collect data in Westchester Lagoon, the outlet to Chester Creek. Alaska Sea Grant funds support a watershed education field trip program for more than 250 Anchorage School District students.
 
Alaska Sea Grant University of Alaska Fairbanks Alaska Department of Education and Early Development NOAA

Photographs courtesy of Reid Brewer, Verena Gill, Heloise Chenelot, Stephen Trumble, and David Menke.

The contents of this website were developed with the assistance of Title II, Part B, Mathematics and Science Partnership Program federal funds from the Alaska Department of Education & Early Development. However, these contents do not necessarily represent the policy of the Department of Education & Early Development, and you should not assume endorsement by the Federal Government.

The University of Alaska Fairbanks is an AA/EO employer and educational institution and prohibits illegal discrimination against any individual: Learn more about UA's notice of nondiscrimination.

Help Using This Site
 

© 2007–2024 Alaska Sea Grant

The University of Alaska Fairbanks is an AA/EO employer and educational institution and prohibits illegal discrimination against any individual: Learn more about UA's notice of nondiscrimination.