| Class Time Required | Activity 1A: 1 class period Activity 1B: 1-2 class periods Activity 1C: 1 class period Activity 1D: 1-2 class periods Activity 1E: 1 class period |
| Materials Needed |
|
| Teacher Preparation |
About 1 hour to assemble materials, determine location for walk, collect water samples, and set up science notebooks. |
| Prior Student Knowledge |
Children will have used their senses of touch, taste, smell, sight and hearing to explore the properties of water. It is helpful if students have had prior experiences in their science notebooks. If not, students will need an introduction to science notebooks. Students need to be able to listen to other children as well as to speak and participate in a large group. Experience using a magnifying lens. They tend to put the lens next to their eye and lean close to the object being observed. |
| Vocabulary |
Adult, data, detective, diatom, direction, environment, globe, larva, magnify, map, observation, ocean, phytoplankton, plankton, planet, tally, zooplankton Words for local water, such as: creek, harbor, lagoon, pond, river, sea, slough |
| Science GLEs Addressed |
K-12 Standards A1, A2, B1, C3, G3 |
 Overview: In this 4-5 day investigation, students begin their discovery of aquatic environments, and start to notice that water is all around them, in their neighborhoods, backyards, oceans, rivers, ponds, and creeks. They take a first look at "Our Big Blue Planet" with a globe game, inspect jars of water and land to think about the differences, and act as outdoor "Water Detectives" to explore and map water on a walk near their school. They finish up the investigation by taking a closer look to see living things in their jars of water.
Focus Questions:
- Where is the water around us?
- How is water different from the land?
- Where is the water in our neighborhood?
- Can we show where the water is around us?
- What do we see when we look closely at water?
Activity 1A: Globe Toss
(one 25-minute class period)
Focus Question: Where is the water around us?
Engagement (5 minutes):
Show the class an inflatable globe. Ask students: What is this big ball? What do you know about our Big Blue Planet? Discuss the different shapes and colors seen, so that students understand what land and water look like on the globe. Note: Avoid using globes that are clear in the water areas. It may be useful to discuss the use of color on the globe.
Exploration (10 minutes):
Introduce the activity. Have students stand in a circle, and begin by tossing the globe to a student across the circle. The student catches the inflatable globe with two hands and looks where their hands are touching. He or she describes the location as "mostly water" or "mostly land." Practice this a few times.
Establish a few ground rules, such as:
Pass the globe to someone across the circle.
Call the name of the student you are passing to, before you toss the globe.
Everyone gets a turn.
When each student catches the globe, he or she tells the class what they are "mostly touching": land or water. The results are tallied on a large chart with two columns marked Land and Water. When the activity is finished, count the tally marks.
Explanation (10 minutes):
Ask students what they notice about the tally marks.
Which had more tallies: water or land? Why do you think (water or land) had more tallies?
Have the students look at the inflatable globe again, and ask:
Do you notice anything you hadn’t noticed before?
Encourage them to share what they notice, first with a partner, and then with the whole group. Record students’ comments.
Elaboration:
Encourage students to notice water around them on their trips to and from school. Where is the water they see? In what other places have they seen water?Evaluation: Notice students’ abilities to observe, estimate, and share what they know.
Activity 1B: What’s in the Jars?
(1-2 class periods)
Focus Question: How is water different from the land?
Engagement (20 minutes):
This activity requires a jar of water collected from a local outdoor source (ocean, pond, river) and a jar of land (soil and rocks), and allows children to begin the questioning process.
Put the jar of water in a paper bag. Have students ask questions to determine what might be in the bag. Guide the class with clues as needed, by telling them:
-
Living things grow and live in it.
-
It is wet.
-
It covers over half of our earth’s surface.
Let them think and discuss their ideas, defending their thinking if there is disagreement.
Show the students the jar of water, then show them the jar of land. Begin a discussion by telling them that these are two things that are part of their everyday life and they already know a lot about them. Explain that today they are going to make a list of ways that the water (in the ocean/river/pond) is different from land." Encourage students to respond with their own ideas. Use chart paper to make a list of all differences. After the class has generated a list of how water is different from land, reread the list.
Exploration (30 minutes):
Place the jar of water and jar of land at a science center, or for a whole class activity put jars of water and land at each table. Distribute science notebooks and a pencil. Review the list of differences brainstormed by the whole class. Support students to make an observation of the water and the land. Students will draw a picture of the water and draw a picture of the land in their science notebooks. Remind them to include the date and a title on the page. Those students who can write labels and/or words can also add those to the drawing.
Explanation:
As they finish their drawings and writing they can pair-share their science notebooks. As more students complete the activity, table groups can then share together.
Elaboration (30 Minutes):
Gather the class together for a story, and read Water by Frank Asch.
The discussion afterward can include questions such as: Where do we find water? What lives in the water around us? How do we know?
Evaluation:
Use class discussion and students’ science notebooks to evaluate their understanding.
A possible rubric to use for scoring follows:
Scoring Rubric:
| 4 | Student drew a detailed picture of the jar of water and the jar of land. Title, date, and labels included. |
| 3 | Student drew a picture of the jar of water and the jar of land. |
| 2 | Student drew a picture of the jar of land but not the water. |
| 1 | Some attempts to draw were made. |
| 0 | No attempt. |
Activity 1C: Water Detectives
(1 class period)
Focus Question: Where is the water in our neighborhood?
Engagement (15 minutes):
This is an awareness activity to focus on the topic of water. Reflect out loud to the class so that they can hear your reflections and wondering process; for example, "I’ve been thinking about our Globe Toss game. It makes me wonder about the water around us." Or "After thinking about the data from our Globe Toss game, I started asking myself: Where is the water in our neighborhood?"
 Ask the students for their ideas about where water might be found. You might write the ideas on chart paper, on cards, or on a clipboard that can be used on the walk as a checklist to see how many places the students were able to predict.
Prepare students to go for a walk outside to notice water in their local environment by having them dress for the weather. Since they will all be Water Detectives they will need to bring their "scientist eyes and ears" with them. Their job is to find water or evidence of water on their field trip.
Exploration (30 Minutes):
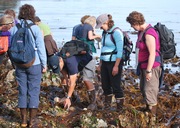
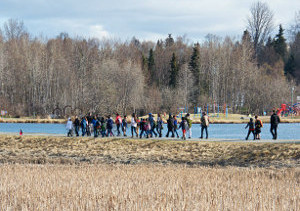
Go on a nature walk to find evidence of water around your school area and beyond. Encourage students to look beyond the school area if mountains, hills, or other features are visible. Look for evidence of water that might not be visible at this time, such as erosion, empty streambeds, or drainage ditches. Carry a clipboard and camera to record what students say and observe, and enlist the help of any additional adults on the field trip to do the same.
Explanation (10 minutes):
Back in the classroom, debrief from the field trip, recording information on a chart with the title "Water Detective Discoveries:"
What did you notice? Where was the water you discovered? Was it close or far away? What direction was the water going? What color was the water?
Read the comments children made while being Water Detectives, and add that information to the chart.
Elaboration:
Encourage students to continue to be Water Detectives on their way home. Where do they observe water? Where is the water near their home?
As homework, students can gather data and talk over their initial ideas about water with their family.
Evaluation:Use a checklist or anecdotal notes to gather an understanding of individual understanding.
Activity 1D: Let’s Make a Map
(1-2 class periods)
Focus Question: Can we show where the water is around us?
Engagement (10 minutes):
Review with students some of the things they observed on their Water Detective walk the day before. Tell them that they will be going back to the same area to draw a "map" that will show where the water is located.
Exploration (30 minutes):
Distribute science notebooks for students to put in their backpacks. Go on a walk, returning to a place where you found water during the previous lesson. Allow each child to find his or her own space for making a map as well as an observational drawing of what they see, hear, and feel around them. Distribute pencils. Remind them to start with the date and a title. As students finish drawing and writing encourage them to share with a partner sitting next to them.
Explanation (20 minutes):
Complete the maps back in the classroom.
Model a science notebook page on chart paper. Ask questions: How did we get there? What was close by? What else can you add to your map? Suggest possible additions such as buildings, bridges, trees, rocks, and docks.
Allow time for students to complete their maps, and have each child share their map with a friend as they finish.
Gather the class together, and have students sit in a circle with their science notebooks on their laps. Ask students to share ideas from their maps, while you make a chart that records common elements from all maps. This is a great opportunity for students to learn from each other. List student ideas on a chart to model writing, and elements of a map.
Elaboration (10 minutes):
Begin an O-W-L Chart with the students. Record the Observations: what students were able to see and possibly what they inferred from what they noticed (for example if they saw garbage in a creek, they might have inferred that the water was dirty or that people had been near the water).
Ask students: "Now that you’ve seen water in our backyard, what are some things you OBSERVED about water?" Tell them: "Later on we’ll come back to: What are some things you WONDER about water? Eventually we’ll document: What have we LEARNED about water?"
Evaluation:
Notice which students are able to share observations of their work. Keep notes or a checklist so that you can make more explicit instruction available for those students who do not seem to be able to work independently.
Activity 1E: Take a Close Look
(1 class period)
Focus Question: What do we see when we look closely at water?
Engagement (10 minutes):
Show students the jar of water that they looked at in Activity 1B: What’s in the Jars? (The water will now be at least 5 days old, and if it has been collected from a tide pool, river, or puddle and left in the sun it will probably have a phytoplankton bloom and a green color.) Ask students what they notice about the water in the jar, and encourage them to share some observations with the whole class.
Prepare students to make an entry in their science notebooks. Tell students they will be working like scientists when they look closely and notice, and that scientists also record their observations. When scientists make observation they record the date and describe what they are looking at. Then they carefully draw what they see.
Exploration (20 minutes):
Place a jar of water at each table or work space.
Ask students to look closely at the jar of water at their table. Pose the following questions: "What do you notice about the water in jar? What colors do you see? Do you notice anything moving? Does the water look the same today as it did last week?" Provide magnifying glasses for each table. Encourage the students to use them.
Have each student draw a picture of what they observe in their science notebook.
Explanation (10 minutes):
Invite students to Pair-Share their science notebook observations.
Ask for volunteers to share with the whole class.
Elaboration (10-20 minutes):
Tell the students where the water in the jar was collected. If time allows, you may have students closely observe a jar of plain tap water that has also been sitting for 5 days, and make comparisons. Ask "Does water from the faucet have living things in it?" "What water is safe to drink?" Discuss the idea that water in our neighborhood has many living things in it that you don’t always see. As homework, students may bring back some evidence (small container, sketch, or photo) of water near their home that had something living in or near it.
Evaluation:
Use class discussion and students’ science notebooks to evaluate their understanding.
Teacher Preparation:
|
Tips from Teachers |
|
Instead of jars of land and water, use trays to allow students to do more detailed drawings. Trays lend themselves better to more eyes, and allow for closer observations and manipulations. |
Read the Teacher Background for more information. Prior to Activity 1B, collect water from a local outdoor water source (ocean, river, or pond). Collect enough to fill 5 jars. (If you plan to do this as a science center activity instead of as a whole class activity, you may need only one jar of water). After completing the What’s in the Jars (1B) activity, place the jars of water in a sunny spot, and save them to use with the Take a Closer Look activity (1E).
For each table group, fill one jar with the water you collected and one jar with soil or rocks representing land.
Prior to Activity 1C, walk possible routes and decide where to take the students to find water in the neighborhood. Arrange for additional adult support as needed.
Science notebooks: Set up a page or two facing pages in the children’s science notebooks for Land and Water comparisons (1B), with spaces for a date, a title, and a drawing of each. Set up a page for making a map and drawing of neighborhood water (1D). Set up a page for recording observations of living things in the water (1E).
Curricular Connections:
Math. The Globe Toss activity helps students practice counting skills and introduces basic concepts of probability and statistics. Allow students to revisit this activity during center or choice time, and encourage students to collect additional data: are their hands touching mostly land or water? They can compare it with the class data chart.
Language Arts. Students develop speaking and listening skills, and begin to practice writing as they use labels with drawings.
Art. Students draw from their observations.
Additional connections to music and poetry can be made by bringing in a picture of the planet Earth from space, and song "Blue White Planet" by Raffi.
| Student Handouts |
Science notebooks |
| Items for Group Display |
Chart paper and markers Book: Water by Frank Asch |
| Material Items |
|
| Facility/Equipment Requirements |
Classroom space to store jars in direct sunlight. An aquatic environment (pond, puddle, stream, slough, beach, etc.) within close walking distance of school. |
Alaska Science Grade Level Expectations Addressed:
In Investigation 1, kindergarten students begin to build toward these K-12 Alaska Science Standards:
Science as Inquiry and Process
(A1) develop an understanding of the processes of science used to investigate problems, design and conduct repeatable scientific investigations, and defend scientific arguments.
(A2) develop an understanding that the processes of science require integrity, logical reasoning, skepticism, openness, communication, and peer review.
Concepts of Physical Science
(B1) develop an understanding of the characteristic properties of matter and the relationship of these properties to their structure and behavior.
History and Nature of Science
(G3) develop an understanding that scientific knowledge is ongoing and subject to change as new evidence becomes available through experimental and/or observational confirmation(s).
Essential Question:
Enduring Understandings:
|


