Alaska Sea Grant

Investigations

Investigation 5 - Sharing What We Know

Class Time Required

2 class periods plus 1-2 hours to participate in celebration

Materials Needed
  • Science notebooks
  • Student work from previous investigations
  • A gathering place and/or audience seating with mini stage
  • Display space in the school hallway or possibly display case
  • Invitations
Teacher Preparation

Organize all of the student work and materials from the unit.

Set dates and invite others to Celebration.

Set up room to facilitate presentations.

Prior Student Knowledge

Experiences that students have had during their K year with art, writing, reading and presentation will assist their ability to be successful throughout this unit.

Vocabulary

Communication, presentation, all vocabulary used during the unit

Science GLEs Addressed

A1, A2, C2, C3

Investigation 5Overview: This investigation allows students an opportunity to share their thinking. They share and communicate their experiences and understanding using their science notebooks, art, photos from the field trip, classroom work, and a mural. First, they practice in the classroom and then share their thinking and work as part of a classroom and/or whole school celebration of the Alaska Seas and Watersheds Curriculum.

Focus Questions:

  • How do we find out information?
  • How can we, as scientists, naturalists, and biologists share our information?
  • How do we share our ideas and thinking?

Engagement (10 minutes):
Reread information about living and nonliving things, to model how to present information. Model different ways of sharing information: Use a science notebook, and then use a puzzle or mini-book in another example. Another way to share might be to roleplay a scientist coming together with other scientists to ask for help in identifying newly found habitat (dress in outdoor gear: coat, hat, and rain-pants with magnifier, science notebook, backpack, etc.)

Students will be using their science notebooks to note experiences and information from their work in describing living and nonliving things. They may also choose to use a mini-book, additions to the class mural, or a sea creature puzzle to "teach" about their understanding.


Exploration (30 minutes):

Work with the students to create a rubric that helps them understand how they are expected to share their information (see Evaluation below). Organize the students to give their own presentations and/or explanations of one aspect of their learning, giving them choices of presentation methods that work for the classroom schedule.

Group the students into pairs to practice sharing their findings. Invite them to roleplay during their presentation, asking fellow scientists (peers) to listen to their findings. Students listen to each other as they share presentations of living and nonliving things. Encourage students to listen carefully and then provide feedback to the practice presenter, asking questions and/or making connections to living and nonliving things based on their own experiences during the classroom unit study.

Science notebooks and all other work should be ready and available when students pair-share with each other. The room should reflect student learning and their experiences during the entire unit.


Explanation (40 minutes):

Students ask each other questions, which can be about specific living and nonliving things presented or about possible connections to different characteristics discovered during the unit. The pair-share practice is about 5-10 minutes long with students asking each other questions at the end.

This is an important part of the learning process. When students ask each other questions, the students giving the information will be encouraged to defend their thinking, share their ideas, and/or agree and disagree with each other about living and nonliving things. This is the place where students get to use their evidence to clarify understanding. They can share specific information found through books and/or experiences. Characteristics (colors, shapes, and sizes) and specific ways living things move will be a key part of the information presented.

Gather the class together to debrief as a whole group. Help students brainstorm what makes a good audience for other students to present their information. Have a few students demonstrate their explanations and allow questioning. Use your rubric to discuss the presentations and talk about what makes a good presentation. Help students to connect their explanations to habitat information, book learning, and their field experience as well as visits from guests and explorations in the classroom.


Elaboration (1-2 hours):

Take part in a Whole School Celebration of the Alaska Seas and Watersheds Curriculum, or organize an opportunity for students to share their learning with others.

One way to organize the overall communication part of the unit is to set up a "scientific conference" for the culmination of the unit. Students can display information, artwork, books, and exhibits from their lessons. Invite parents, community members, and/or other classes to come, view, and listen. All through the unit the teacher should call each discussion and/or investigation of information a “mini-conference” letting children know that their final information will be shared at the scientific conference. In this way, children will be expected to offer a piece of science information for the conference, emphasizing that everyone’s thinking would be important to the whole process.

Gather students together for the scientific conference. Students will act as groups of “scientists” who will report their findings to the rest of the group. It is fun if the lead educators are quirky conference reporters during this conference, so that key questions can be asked of the scientists: “How did you come about these findings?” and, to a member of the‘audience’: “How would you have gone about answering this question?” In particular, it is key to prod students to ask and answer their own questions about the data they are collecting and the merits of their methodology.


Evaluation:

Create a rubric with the students (see rubric ideas in resources) so that they will understand the different aspects of presenting information to others. Criteria might include speaking in a clear voice, showing evidence, asking for questions, and sharing enthusiasm. It is important for students to be part of the process so they can understand the expectations and purpose of sharing information. Roleplay with the class to assist this process once the rubric is created. Ask students to watch for best ways to give information.


Teacher Preparation:

Tips from Teachers

Do presentations informally, in "fair booth" style where parents and staff can mingle and inquire.

Do a drama circle activity. Prior to the lesson, have each student record themselves on a cassette recorder. Limit them to one minute to tell what they learned. When students share their work they can choose actors to help act out their recorded story.

Read the Teacher Background for more information.Find exemplars in science notebooks, mini- books, on the mural, and in other work to demonstrate the sharing process to students. Be sure that student work and materials from the entire unit are accessible to students during this investigation.

Decide on a date and time, then prepare and send out an invitation to parents and possibly flyers to the community to come to your celebration. Students may help to generate the invitations. Organize refreshments and a seating area for demonstrations, explanations, and other activities.


Curricular Connections:

Language Art. The investigation provides experience in speaking and listening.

Art. Students practice presenting and critiquing art.


Materials Needed for Investigation 5:  

Student Handouts

Science notebooks

Items for Group Display

Any charts, lists, and displays used during the unit

Material Items
  • All materials related to the unit, including:
  • Books
  • Posters
  • Samples of living and nonliving things
  • Any specimens collected
  • Jars of water and land
  • Pictures
  • Field trip equipment
Facility/Equipment Requirements 

Hallway, wall, and other display space.

Gathering space for student presentations with "audience seating."


Alaska Science Grade Level Expectations Addressed:

In Investigation 5, kindergarten students begin to build toward these K-12 Alaska Science Standards:

Science as Inquiry and Process
(A1) develop an understanding of the processes of science used to investigate problems, design and conduct repeatable scientific investigations, and defend scientific arguments.

(A2) develop an understanding that the processes of science require integrity, logical reasoning, skepticism, openness, communication, and peer review.

Concepts of Life Science
(C2) develop an understanding of the structure, function, behavior, development, life cycles, and diversity of living organisms.

(C3) develop an understanding that all organisms are linked to each other and their physical environments through the transfer and transformation of matter and energy.

Essential Question:

  • What are the characteristics of the living and nonliving things you discover in the water?

Enduring Understandings:

  • Living and nonliving things in Alaska waters come in a great assortment of colors, shapes, and sizes.

  • Living things move, grow, and change.

Investigation 4 - Field Trip Session

Class Time Required

Two 30-40 minute class periods plus 1-2 hours on field trip

Materials Needed
  • Copies of Scavenger Hunt list
  • Nets
  • ID charts
  • Magnifiers
  • Buckets
  • Science notebooks
  • Writing tools (pencils, colored pencils)
  • Small rulers
  • Thermometer
  • Digital camera
Teacher Preparation

Find and visit field site.

Organize additional adults and transportation (if needed).

Gather and organize field equipment.

Set up science notebooks. 

Prior Student Knowledge

Prior field trip experience will familiarize students with expectations.

Children will have had experiences with books, photos and identifying living and non-living things. Support to connect "book learning" with field learning will be useful.

Vocabulary

boundaries, data, etiquette, living, non-living, observation, recording

Science GLEs Addressed

A1, A2, A3, C2, C3, G3

tidepools.gifOverview: Children go outdoors to explore a local habitat. They see, feel, and think about the living and nonliving things in the water. Science notebooks are used to gather information about what they find. Students use their background knowledge from prior classroom experiences, the initial field trip, classroom investigations, and other observations to notice and observe the living and nonliving things in their environment. Students have plenty of time to explore and discover before being asked to write and draw in their science notebooks.

Focus Questions:

  • What can we find in the water?
  • What are the characteristics of living and nonliving things?
  • How can we discover what is in the water?

Engagement (30 minutes):

Create a scavenger hunt checklist (Sample scavenger hunt list #1, Sample scavenger hunt list #2 ) to organize a hunt that will prepare children for the aquatic field trip. This scavenger hunt is an important experience so that expectations for the aquatic field trip are clear and understood. It can be inside or outside, and specific to your local environment and/or classroom. This is an enjoyable way for students to learn to make careful observations, to stay in one place to "find" living and nonliving things, and to zoom in on small and not as obvious characteristics. During a scavenger hunt debriefing session, support students to use vocabulary they will need for the aquatic field session. Using a properties chart to note colors, shapes, sizes, and other characteristics can provide scaffolding for this experience.


Exploration (1-2 hours or more):

Discuss field trip etiquette with students prior to the field trip. Helpful sources:

On the field trip, students will work in small groups along with a parent volunteer to discover living and nonliving things in the water. Children will have an opportunity to discover and explore for the first 30 minutes, and then have time to explore, draw, write, and label the living and nonliving things that they find in one small area.

bog
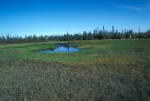
Gather students together, explain the boundaries, and remind the students of field trip etiquette. Agree on a signal for gathering (such as a whistle) and let students know they will have 30 minutes to explore before they take part in a more focused activity. Be sure that each volunteer has a list of the children in their group and all of the possible tools they will need (nets, pencils, rulers, magnifiers). Students will explore the freshwater or saltwater habitat, using skills of observation, documentation, and connecting the information they have had in the classroom investigations to these outdoor experiences. Allow students to use the first 30 minutes to explore freely and notice animals and/or plants, rocks, sand, mud, etc. (living and nonliving) that are in the area. After 30 minutes, bring students back together with a signal.

Next, each group of students will choose one area in which to gather data, make observations, and record information in their science notebooks. Move between groups to support students by asking questions such as "Can you take a closer look?" "What kinds of colors can you see?" "What is bigger?" "What are the living things you see?" "What is not living?"

Afterward, gather the students to share their data with each other. With the help of the adults, be sure that each child shares something from their exploration. Compare and contrast information from each observation. Later, graphs can be made to organize these data and make connections to what is living and what is nonliving.

After the sharing time, encourage students to return to a different area to focus more closely. Students will be instructed to once again choose one small area in which to draw, write, and describe specific animals, rocks, plants, and other things they can see. Encourage them to label, include descriptions, and note the weather, time, and other observations of what is around them. Let the children know they will be sharing their information with other children and adults, to help them understand their audience and purpose. Visit each student and take a digital photo to assist with the documentation of what they see. Be sure to keep track of the photos taken, so that students can access their own photo back in the classroom.


Explanation (30-40 minutes):

When students gather during the aquatic field trip, have them pair-share their notebooks with a partner from another group. As a child from one area describes different characteristics, children can compare and notice differences. Guiding questions from adults can include: "What is the same?" "What is different?" "Why do you think so?" This supports students to use vocabulary and share evidence from their observations. Students should also be supported to ask questions: What else do they wonder about from this observation? See sample questions to encourage scientific thinking.Image

After returning to the classroom, provide time for additional discussion and explanation. Gather students to share their information and debrief the field session. Ask them: "What went well?" "What else do you wonder now?" "What kinds of questions can we answer in the classroom?" "What could we answer if we had another opportunity for a field session?" Guide the students to ask more questions: what else do they now wonder about? How will they find out more information?


Elaboration:

This activity provides students with opportunities to use vocabulary, ideas, and skills that they learned and practiced during the initial exploration of living and nonliving things in earlier parts of this unit. Students document learning in the science notebooks to reflect their understanding.

As homework, children may take home information from the field trip and compare to the environment around their home. What is the same? What is different?


Evaluation:

If desired, use a checklist during and/or after the field trip to document children’s skills and accomplishments. During the classroom debriefing, have students share their science notebooks, showing and discussing the general as well as specific information of the day.

This may be a good time to complete the OWL chart (refer to Investigation 1 charts). First brainstorm about living and nonliving things. What did we notice? What characteristics did we observe? What didn’t we see? What could we see if we were able to go to a different area? Then, "What did we find out about living and nonliving things?" "Did we see any living things that were moving?" "How do you know?" "What other questions do we have?" Note how students connect book and classroom learning with the field session experiences.

For formative assessment, use science notebooks for specific information from the field session. Have children draw and write about their new understanding from the experience, adding labels and information. Additional questions and "wonderings" can be added either by students writing and/or teacher taking dictation, with the objective of getting student’s thinking into the science notebook. Use a rubric to assess depth of understanding, creating the rubric with students if possible (see rubric ideas).


Teacher Preparation:

Tips from Teachers

Make gold rocks with metallic spray paint and hide them around the beach, to include on the scavenger hunt. These encourage deeper exploration, particularly along tide lines and in the rockweed as students search for gold.

Instead of science notebooks, use the scavenger hunt list as a guide for the explanation/elaboration the following day. Collect a bucket of non-living samples to bring back to the classroom and draw (be sure to return them to the beach).

Read the Teacher Background for information.

Set up pages in science notebooks for the field observations. See science notebook sample pageImage.

Create a scavenger hunt for students. Prepare a scavenger hunt for students by assembling small pictures and sketches onto a sheet of paper. Example 1 Image Example 2 Image The students will circle or check the objects that they can find.

Scavenger Hunt Resources: Intertidal organisms line drawings Image Freshwater organisms line drawingsImage

This activity might be used indoors or outdoors. Indoors, you can include sketches or pictures of specimens that are in the room, as well as things that students can find on posters or displays, or even books. Outdoors, you can include things that students would be able to find such as barnacles, rocks, seaweeds, and shells. 

A different type of scavenger hunt that could be used outdoors allows students to find things and draw them themselves. Older students or adult volunteers would need to work with small groups of students to help them with reading. 

Prior to the field trip make a quick visit to the site for information and ideas. If possible, go at a time of day or tide similar to the planned trip. It will be valuable to scope out bathroom possibilities, areas to gather the group, potential dangers, and natural boundaries. Shelter may be necessary for inclement weather and if none is present it may be desirable to set up a tarp.

Organize parent volunteers and transportation as needed, and if possible find naturalists or scientists to come along on the field trip. Locate field guides (beachcombers guide, insect guide) and other tools for the trip, making sure there are plenty for small groups or pairs, and organize backpacks to carry them. Bring snacks and water if desired.


Curricular Connections:

Literacy is supported through the use of science notebooks.

Explorations of local geography can be tied in with the field trip.

Math skills can be built through sorting, counting, and finding differences and similarities.

Art is incorporated as students draw from observation.

Ideas for adapting to different local environment or context:

Sea: Establish beach boundary and awareness of tides. Teach children how to turn over rocks to observe and notice, putting them back in the same place afterward.

River or creek: Establish boundary and awareness of zones.

Puddle: Create small groups for investigations.


Materials Needed for Investigation 4:  

Student Handouts

Science notebooks

Copies of Scavenger Hunt list

Items for Group Display

This Is the Sea That Feeds Us by Robert F. Baldwin

Sea Soup by Mary Cerullo

Optional: Class poster template for Sea Soup Recipe

Material Items
  • Nets
  • ID charts
  • Magnifiers
  • Buckets
  • Science notebooks
  • Writing tools (pencils, colored pencils)
  • Small rulers
  • Thermometer
  • Digital camera
Facility/Equipment Requirements 

An outdoor aquatic environment (beach, riverbank, creek, pond) with space for children to explore safely


Alaska Science Grade Level Expectations Addressed:

Standards Addressed

In Investigation 4, kindergarten students begin to build toward these K-12 Alaska Science Standards:

Science as Inquiry and Process

(A1) develop an understanding of the processes of science used to investigate problems, design and conduct repeatable scientific investigations, and defend scientific arguments.

(A2) develop an understanding that the processes of science require integrity, logical reasoning, skepticism, openness, communication, and peer review.

(A3) develop an understanding that culture, local knowledge, history, and interaction with the environment contribute to the development of scientific knowledge, and local applications provide opportunity for understanding scientific concepts and global issues.

Concepts of Life Science

(C2) develop an understanding of the structure, function, behavior, development, life cycles, and diversity of living organisms.

(C3) develop an understanding that all organisms are linked to each other and their physical environments through the transfer and transformation of matter and energy.

History and Nature of Science

(G3) develop an understanding that scientific knowledge is ongoing and subject to change as new evidence becomes available through experimental and/or observational confirmation(s).

Essential Question:

  • What are the characteristics of the living and nonliving things you discover in the water?

Enduring Understandings:

  • Living and nonliving things in Alaska waters come in a great assortment of colors, shapes, and sizes.

  • Living things move, grow, and change.

Investigation 3 - Living and Non-Living Things in the Water

Class Time Required

Activity 3A: 1 class period
Activity 3B: 1 class period
Activity 3C: 1-2 class periods
Activity 3D: 1-2 class periods
Activity 3E: 2-3 class periods

Materials Needed
  • Tagboard or construction paper for puzzles
  • Larval to adult marine puzzles
  • Larval to adult  freshwater puzzles
  • Science notebooks
  • Resource books, posters, pictures, ID charts, films
  • Objects from aquatic environments (shells, rocks, etc.)
  • Picture and description of pseudoscorpion
  • One mini-book per student
  • "Class Book" pages with words printed on them
  • A wide variety materials with texture; cloth, plastic, thread, yarn, etc.
  • Glue or glue sticks
  • Magazines for cutting
  • Art materials: large sheets of paper, tempera paints, construction paper, newspaper, paper fasteners (brads), toothpicks, paper bags, markers, wire, and other materials. Children may have ideas of materials to use.
Teacher Preparation

Prepare puzzles

Print the photos and description of the pseudoscorpion. Print the small picture.

Compile resources and materials.

Print, copy and fold mini-books.

Prepare class book pages with the words printed out.

Cut, sort and organize textured materials.

Gather, prepare, and organize art materials for murals.

Prior Student Knowledge

Information from previous lessons with plankton and microscopic creatures. Experience with animals such as class pets, and with a variety of living and nonliving things in the aquatic environment. Experience with glue or glue sticks.

Vocabulary

aquatic, balance, body, bristles, change, claws, color, develop, environment, feel, grow, jaws, legs, living, look, move, mural, oval, non-living, phytoplankton, pincers, segments, shape, size, texture, zooplankton

Science GLEs Addressed

A2, C2, C3

Investigation 3Overview: In this 6-9 day investigation, children assemble simple puzzles to learn more about aquatic animals and their life cycles. They look closely at the parts of a small aquatic animal with a listening and drawing activity, then learn to describe and explain the things in aquatic environments by making mini-books, a class book, and a large class mural.


Activity 3A: Aquatic Puzzles

(1 class period)

Focus Questions: How do we know living and nonliving things are in the water around us? What do they look like when they are growing?

Engagement (5 minutes):
Introduce the tiny creatures of our blue planet by making a dot with a pencil on a piece of paper. Explain to students that this is how big the animals are, that they will be looking at and studying through books, puzzles, and investigations. Remind them that through earlier investigations they found out about plankton and how they feed bigger animals. Explain that they will now look at the characteristics of these living creatures!

Exploration (20 minutes):
Show the students a full puzzle. Explain that when the puzzle pieces are assembled and lined up they show how one creature develops, from zooplankton (stage) to adult animals.

Macro-micro marine puzzles

Macro-micro freshwater puzzles

Ask the students, "What do you notice about the zooplankton stage of the animal?"

Show a variety of puzzles and support students’ vocabulary.

Distribute the two-part puzzles of marine or freshwater animals for students to assemble.

Students will notice and describe the difference between the 2 stages of development.

On the bottom of each puzzle is a simple sentence. I am a _______. Children may practice recognizing the different animals and checking the sentence to see if they are correct.

Explanation (at same time as Exploration):
Have students explain their thinking by showing the puzzle piece and identifying the characteristics of each creature. They can notice the size, shape, and possible features of the animal that help it move in an aquatic environment. Rather than just putting the puzzles together, the children need to be supported to notice specific characteristics as they work on the puzzles.

Using the question "what is your evidence?" will support students to recognize the need to explain their thinking.

Elaboration (ongoing):
Give students opportunities to continue putting these puzzles together during activity center time. In this way, children will explain their thinking to their peers and connect it to other activities and games they are playing. Students could also make connections of other developing animals they are familiar with, applying it to classroom pets (fish, turtles, doves) and/or family pets or themselves. Having large paper available in the classroom and paper at the easel for drawing and painting, along with posters of life cycles of aquatic animals, will assist children to make these connections.

Evaluation:
Listen to student’s thinking and document understanding with a checklist. Misconceptions and/or misunderstandings of developing creatures can be addressed through small group discussion or by bringing it back to a large group discussion about the use and understanding of the puzzles.


Activity 3B: Drawing from Description

(1 class period)

Focus Question: What parts of an animal make it special?

Engagement (10 minutes):
Hold a small, simple object (toy, block, etc.) in your hand or in a bag and explain that you will describe it without showing it.

The students will draw a picture of it in the air (using their finger as a sky-writer) as they hear words that describe it. Use simple descriptions at first so that everyone is successful: "It is round," "It has four lines," "It is smaller than my hand," etc.

Ask the students to be scientists, using the clues to draw the object and think about what it could be.

Let them know they will be doing a drawing activity, and they are only going to get an oral description so they will have to listen carefully!

Exploration (20-30 minutes):
Explain that without looking at a picture, the students will be drawing a creature.

Guide the students through a drawing discovery activity:

Ask everyone to open their science notebook to a clean page. Explain that you will ask students to draw one part at a time of a special creature. The students will have to listen carefully.

Read the drawing directions:

  • I have 2 parts. One is big and the other is smaller. They are oval in shape. Draw 2 body parts! (You may provide scaffolding by giving more information—put one oval near the side of your paper, draw another oval so that one side touches the first oval.)
  • The small body part has a pair of biting jaws. Draw them. (You can demonstrate with your finger and thumb, moving back and forth.)
  • The small body part has 2 pincers. Draw 2 pincers. (You can demonstrate by moving hands and thumbs together, describing the pincers coming out of the small oval.)
  • Put tiny bristles on both pincers (little lines).
  • The small body part has 4 pairs of walking legs. Draw the 4 pairs of walking legs.
  • Each walking leg is armed with claws. Draw claws on each walking leg. (Again, a visual image of fingers shaped to look like claws may be helpful.)
  • The large body part has 12 segments. Make 12 segments (lines) on your animal.

Now your creature is complete—does it look like a living animal?

Explanation (10 minutes):
scorpion
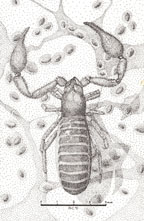
Have children pair up and share the animals that they drew in their science notebooks.

Then, show the drawing of the pseudoscorpion (they are less than 1/3 of an inch long).

Read a description of the pseudoscorpion from one of these sources:

Utah State University Extension

Description of pseudoscorpions from Penn State College of Agricultural Sciences

If you have the book,The Nature of Southeast Alaska, there is a interesting description of the pseudoscorpion!

Elaboration:
Give each student a small drawing of a pseudoscorpion that matches the size of the science notebook. Students can glue this in their science notebook next to their own drawing. Have children compare their drawing to the scientist’s drawing. Some students may go on to label each part or write a short description of the pseudoscorpion.

This activity could be repeated with an animal or plant description that is very common to the local area. Students will have the opportunity to continue to practice listening and drawing skills.

Evaluation:
Notice children who are able to draw from oral description, and those who may need more experience with the vocabulary that describes a pseudoscorpion.

Extension:
Allow children to practice giving clues to others for drawing.


Activity 3C: How Does It Look and Feel?

(1-2 class periods)

Focus Question: What words can you use to describe this aquatic living or nonliving thing?

Engagement (15 minutes):
Read a book specific to the living and nonliving things in your aquatic environment. Books with simple text and photos, such as those published by Heinemann, are useful. Possible books are listed in the Bibliography and Resources section for this unit. Have children notice the photos and/or illustrations, and talk about what they see and what words they can use to describe it.

Model the use of the sentence "I see a …"

Model first using one describing word and eventually two describing words such as a color word and a texture word. For example; "I see a soft green anemone." Use a pocket chart to model matching words with the picture, and/or display a photo or drawing of the anemone (or other local creature) along with the sentence strip. Model both a living thing and a nonliving thing. You might also model the characteristics with the pocket chart, and sort them by color, shape, and size. The pocket chart could be used as a "word bank" for children to have support with writing their mini-book.

Exploration (20-30 minutes):
Children will use their experiences with both living and nonliving aquatic things to make a mini-book. By this time there should bescallop 
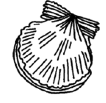
books, posters, drawings, science notebooks and other resources around the room to use for getting ideas. These mini-books will focus on shape, size, and color. Children may start their book with illustrations and/or with words. The teacher emphasizes that the pictures must match the words. For example: "I see a red sea star." "I see an oval limpet." "I see a large sea anemone." "I see a dark rock." "I see squishy mud." "I see a white barnacle." "I see a ______." "I see a _____."

Students write and draw something unique that they see. They can start with one descriptive word and extend to two, such as "I see a large white barnacle." The teacher may want to decide how many nonliving things to put in the book to support comparison and contrast of living and nonliving things.

Explanation (10 minutes):
After children have finished their book they can read and share their book with a friend. Provide support for the children to compare and contrast the things they chose to put in their book: "What is the same?" "What is different?" "How many are living?" "How many are nonliving?" Challenge children to come up with more than one way that they can know if something is living or nonliving. Some children may want to make more books.

Elaboration (15 minutes):
Gather students as a large group (or smaller groups if they are finishing at different times). Ask them to discuss their ideas of living and nonliving things in aquatic environments. Mini-books can be compared and a class list of all the living and nonliving things in the books can be made. If desired, put all of the items on tagboard (using both the word and a child-drawn picture) so that students can move them on a pocket graph, noting which is living and which is nonliving and then explaining how they know. These same cards could also be used for a graph of how living things move—legs, fins, tail, etc. This could become an independent center to encourage use of the vocabulary and understanding of the characteristics.

Evaluation:
Students will be able to show their understanding of a variety of characteristics in an individually made and colored mini-book. Use authentic assessment, having children read their books to the teacher or a peer. A checklist may also be used to note which students are able to match pictures to the words, and which children are able to sort nonliving and living things on the pocket chart.


Activity 3D: Our Book about Things in the Water

(1-2 class periods)

Focus Question: How can you describe the characteristics of this living or nonliving thing?

Engagement (10 Minutes):
Pass an object around the group, and ask children to describe how it feels. Use their words to model describing sea creatures or other aquatic living or nonliving things. Use objects from the local area such as rocks, shells, bark, sticks, feathers, leaves, etc.

For example, to describe a scallop shell: "Bumpy," "smooth," "sharp edges."

Ask the children "What kinds of materials could we use to show that in a book?"

Paper, fabric, and other materials will be used to create a class book that supports children’s use of descriptive words.

Exploration (30-40 Minutes):
Students will work in pairs to create a page for the class book. Using photos, magazine cutouts, or drawings of local living and nonliving things, children then describe how the thing would feel. They choose a material with an authentic texture.

For example, cardboard = bumpy (shell or a sea creature), sea star = sandpaper, bird = feathers, fish = scaly fabric.

Each pair will use a page that already has words printed on it, taken from the previous lesson. Students can then read the words and add their drawing and texture. Brainstorm additional textures for living and nonliving things, including lots of repetition.

Pages for the class book can be as follows:

Page 1: You can learn by looking.

Page 2: You can learn by touching.

Page 3. The sea star looks rough.

Page 4. This feels rough.

Page 5. The ______looks smooth. (shell) ?

Page 6. This feels smooth.

Page 7. The ______looks hard. (rock) ?

Page 8. This feels hard.

Page 9. The ______ looks bumpy. (barnacles) ?

Page 10. This feels bumpy.

Page 11. The _____looks soft. (feather) ?

Page 12. This feels soft.

Last page: Can you remember the way each thing feels?

Explanation (20 minutes):
As students work together on their page, they talk with each other about how they will use materials to show and demonstrate the texture. When the whole class reads the book together, each team will be able to explain their thinking to the group. If someone disagrees with the material they used, the teacher supports the team to defend their thinking.

Elaboration:
When students have finished their pages, they can make their own small book or an additional page for the class book.

Evaluation:
Note the ways students are able to work together, learn from one another, and show their understanding on the class book page. Also note the students’ ability to talk about their work and identify how they knew about their chosen item on the page (past experiences, books, film, television, etc.).


Activity 3E: Making a Mural

(2-3 class periods)

Focus Questions: How do we know living and nonliving things are in the water around us? How can we show this to others? How can we share our learning with others?

Engagement (20 minutes):

Tell the children they are going to create a mural of an aquatic environment to teach others about their experiences and learning. Ask them to name all the living and nonliving things they can think of that are a part of an aquatic environment.

This could become:

  • An interactive writing activity to engage more learners. Share the pen with children as they write the letters and/or words they know. Keep this part of the lesson going by providing paper and/or white boards to other children to keep them writing and engaged at the same time. Everyone gets an opportunity to add to the big class list.
  • A roleplay of creatures or nonliving things. Children can act out the thing while others guess what it is, giving their explanations of how they know. For example, a child sits still and doesn’t move for a rock, or moves their fins to be a fish.

Support students to make a choice of how they will represent their living or nonliving thing. Explain how paints, markers, paper for sculpture, and/or bags for puppets might be used. Children will start with a first choice and then later they can self-choose an additional item or a way to add color or texture to the mural.

Exploration (45 minutes to one hour):
The aquatic environment may be a tide pool, lake, river, puddle, or something that is specific to their local experiences. Allow students choices of making living and nonliving things for that environment. Set up the classroom to have students work in small teams; some will work on the mural background while others cut and draw aquatic creatures, and others make rocks, sand, or mud. Place aquatic resources around the room (photos, magazines, books, and posters, etc.). Encourage the students to make textures by placing sand in the paint for sea stars, or supply a variety of fabrics with textures for students to create plants and animals with. Finger paints can be used for the background. Use large sheets of paper and cover a large area on the floor with a shower curtain to make a work area. Movement of water can be made with lines and movement of the hands. Paper in strips with paper fasteners can be used for sculptures with moving parts. Paper bags can be used to make puppets. Colorful paper can be used to make streamers in the classroom to simulate seaweed or kelp. Newspaper can be used for stuffing paper sculptures of larger rocks and/or living things. Once the living and nonliving things have been painted and dried they are attached to the mural with tape or in some other way.

As an example, a tide pool mural might include rocks, sand, mud, small fish, crabs, sea anemones, limpets, clams, seaweed, and sea stars. Some children may want to add gulls or other birds that get their food from an aquatic environment. This adds to the complexity of the art lesson, and adds ideas to make for a richer discussion.

Explanation (20 minutes):
When the mural is nearly done, children can gather to show their additions to each other. Support the students to use aquatic vocabulary along with describing words. Questions such as, "Why did you put your sea star in this place? or "How did you know where to put the rocks?" will support children to explain and defend their thinking with visual evidence.

Later, students can notice many of the things on the mural and explain their thinking of how they chose color, texture, size, and shape. This is good practice for presenting to an audience, as they will do during the culminating activity later.

Elaboration:
As students finish their work on the big mural they can create their own individual tide pool and/or river environment, using art materials and supplies. Or, they could help a friend finish a part of the project. Children can read, write, or draw as they finish, letting others finish before everyone helps with the cleanup and once again gathers as a large group.

Evaluation:
Gather the children together as a large group, or in smaller groups if some children need more time to finish their work. Use a checklist or a record of how children are able to explain their placement of a nonliving or living thing on the mural. Individual tide pools or other aquatic environments also provide evidence of understanding. Note which children are able to use their descriptive language independently and which children might need more support.


Teacher Preparation:

Tips from Teachers

Use whiteboards instead of notebooks for the drawings from descriptions. This helps alleviate some of the pressure to make drawings 'perfect' if you have perfectionists in your class. This also lets students play more with drawing from descriptions, without worrying about materials.

(Activity 3B) Instead of sky-writing have the students use write on/wipe off boards with dry erase markers and mittens as erasers.

(Activity 3B) Pre-teach vocabulary words: oval, jaw, pincer, bristles, claws and segments.

(Activity 3C) Before beginning the activity, teach the words - living and nonliving by making posters on butcher paper with pictures that students cut from magazines and catalogs. Compile a graph of living and nonliving things.

(Activity 3D) Draw visual clues for the class book. For example: You learn by (draw a pair of eyes) looking.

Use aquarium background sheets cut into sections for each group. The children can make other living and nonliving objects to glue to the aquarium background papers.

Make "mini-murals" as a precursor to a collaborative mural. Use a big piece of paper with a simple water line and sea floor (indicating depth) and add fingerprints all over it. Students can turn their fingerprints into all sorts of creative marine organisms. Ask them to pay attention to habitats and water depths for specific organisms.

Read through the Teacher Background information.

Make several 2- or 3-part puzzles showing life cycle stages of aquatic animals, for Activity 3A.

Larval to adult marine puzzles

Larval to adult  freshwater puzzles

If it is known that the class may have challenges with the drawing activity in Activity 3B, prepare templates of ovals, pincers, walking legs, etc. The children could then use these shapes to trace and put together the pseudoscorpion so they can be successful. Later a different creature could be drawn from oral description.

Print (or prepare to project) the drawing and print the description of the pseudoscorpion to read to students. Copy the small drawing of the pseudoscorpion for each science notebook.

Compile resources including books, posters, and aquatic objects.

Create a mini-book with pages relevant to your area, or copy and fold the mini-books provided here for students to complete in Activity 3C. Mini-book folding instructions.

For Activity 3D, cut, sort, and organize fabrics to represent textures.

Prepare class book pages with printed words.

For Activity 3, have large pieces of paper along with smaller colorful paper to use.

Make tempera paints accessible, with large brushes. An assortment of sculpture materials can be sorted into small boxes or containers: wire, toothpicks, pipe cleaners (chenille sticks), popsicle sticks, cellophane, etc.


Curricular Connections:

Math. The drawing lesson may help students develop spatial sense. Activity 3C provides practice in sorting.

Language Arts. Students read sentences and match words to pictures, draw, write, and use descriptive language. They develop listening skills and give oral descriptions.

Art. Students experience drawing, develop a sense of space, and use color, shape, size, texture, representation, and design. They use a variety of materials.


Materials Needed for Investigation 3:  

Student Handouts

Science notebooks

Notebook-size copy of pseudoscorpion picture

Mini-books

Larval to adult marine puzzles

Larval to adult  freshwater puzzles

Items for Group Display

Class Book pages

Resource books, posters, pictures, ID charts

Picture and description of pseudoscorpion

Material Items
  • Tagboard or construction paper for teacher-made Aquatic Animal puzzles.
  • Small objects (rocks, shells, etc.) from aquatic environment.
  • Wide variety of textured materials to glue onto paper: cloth, sandpaper, cardboard, plastic, thread, yarn, etc.
  • Glue or glue sticks.
  • Magazines for cutting.
  • Art materials: large sheets of paper, tempera paints, construction paper, newspaper, paper fasteners (brads), toothpicks, paper bags, markers, wire, and other materials. Children may have ideas for materials to use.
Facility/Equipment Requirements 

Work space for creating a large mural


Alaska Science Grade Level Expectations Addressed:

In Investigation 3, kindergarten students begin to build toward these K-12 standards:

Science as Inquiry and Process
(A2) develop an understanding that the processes of science requires integrity, logical reasoning, skepticism, openness, communication, and peer review.

Concepts of Life Science
(C2) develop an understanding of the structure, function, behavior, development, life cycles, and diversity of living organisms.

(C3) develop an understanding that all organisms are linked to each other and their physical environments through the transfer and transformation of matter and energy.

Essential Question:

  • What are the characteristics of the living and nonliving things you discover in the water?

Enduring Understandings:

  • Living and nonliving things in Alaska waters come in a great assortment of colors, shapes, and sizes.

  • Living things move, grow, and change.

Investigation 2 - Sea Soup

Class Time Required

2-3 class periods

Materials Needed
  • This is the Sea That Feeds Us by Robert F. Baldwin
  • Sea Soup by Mary Cerullo
  • Sea Soup recipe copies for students PDF
  • Marine Lotto PDF
  • Freshwater Lotto PDF
  • Science notebooks
  • sequins, spangles, beads
  • jars
  • plankton nets
  • water tubs
  • local field guides or identification keys for rocks, shells, etc.
  • Inflatable globe
  • Flannel board and felt for cutouts
  • Lotto cards and Lotto Boards
  • Blue/green fabric sheet or butcher paper
  • Paper cups
Teacher Preparation

Gather materials and prepare flannel board cutouts, Lotto cards, and Lotto Boards.

Set up the classroom to provide space for children to explore water centers.

Prior Student Knowledge

Field trips and experience with water outside of school would be useful would help children with this activity. Listening skills.

Vocabulary

Living, non-living, phytoplankton, zooplankton

Science GLEs Addressed

K-12 Standards A2, C2, C3

Investigation 2Overview: In this 2-3 day investigation, children begin to learn about the tiny plants, animals, and nonliving things that are in sea, river, or pond water. They listen to a read-aloud, explore at learning centers, roleplay, and then make a recipe for Sea Soup.

Focus Questions:

  • What is in the water around us?
  • How do you know?

Engagement (30 minutes):
Introduce the idea of Sea Soup through a read-aloud: This Is the Sea that Feeds Us by Robert F. Baldwin and/or Sea Soup by Mary Cerullo. Then, lead a discussion and brainstorming session about what is needed to create a recipe for Sea Soup. Support students’ thinking by making a poster, graphic organizer, or bubble chart to record children’s ideas.


Exploration (45 minutes to 1 hour):
Set up the classroom to support learning centers that have to do with Sea Soup:

  1. Water center, with plankton nets that students can use to filter water and see pretend plankton (large sequins or other available objects) in the water.
  2. Water center, with rocks and shells and laminated field guides (such as MACs) or local ID charts.
  3. Globe Toss
  4. Flannel board to retell story, using cutouts of "characters" from the story. 
  5. Lotto game with both living and non-living things represented.(see samples provided)

Explanation (15-20 minutes):
Gather the whole group for a dramatic role play of Sea Soup:

Use green sequins and spangles to represent phytoplankton and different colored sequins, spangles, and beads to represent zooplankton.

  • Invite students to sit around a large blue sheet (paper or cloth) on the floor.
  • Ask the students: "Who are you in a tide pool?" (or Who are you in a river? or a pond?) Each student chooses an animal that they want to be; it must be an animal that eats phytoplankton and/or zooplankton.
  • Explain to them that they must remain sitting in one space, only moving their arms from this space.
  • Sprinkle phytoplankton in the sea and let the "animals" begin "eating" (collecting in a cup) phytoplankton.
  • Next, sprinkle larger zooplankton in the sea and let children "eat" zooplankton.

Describe the sea soup process, reading excerpts from Sea Soup by Mary Cerullo as children collect plankton. Discuss, and encourage students to ask questions: "What are you eating?" "How do they know what to eat?"


Elaboration (20 minutes):
Have the students illustrate, draw, and/or explain the Sea Soup recipe in their science notebooks to show their own seasoup
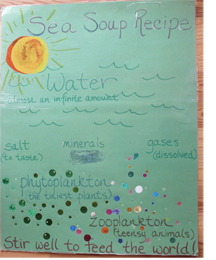
understanding of what is in the water around them. To support student success with this independent drawing and labeling activity, you may wish to supply them with cutouts of sea soup ingredients that can be colored or examples to draw from.


Evaluation:
Create a checklist based on the expectations for understanding. Make sure the drawing includes water, phytoplankton, zooplankton, the sun, and possibly minerals and salts.


Extension:
Have children make individual jars of Sea Soup, following a class recipe or one they may have written in their science notebook.

Some possibilities for a recipe include:

A cup of water, salt, glitter (minerals), green sequins and spangles (phytoplankton), multicolored sequins and spangles (zooplankton), breath of air (oxygen), and possibly some blue or green food coloring.

Shake and mix the jar of Sea Soup, to "feed the world"!

Have children explain their thinking about their recipe. "What did they put in the Sea Soup?" How did these creatures feed the world?


Teacher Preparation:

Tips from Teachers

Add another center with an art focus: make bioluminescent zooplankton, prints from shells, rocks, seaweed, etc.

For the evaluation checklist, give visual clues. For example, actually glue green sequins and spangles on to a page to represent phytoplankton and different colored sequins on to the page to represent zooplankton.

Add a dramatization of the sea soup after making the poster. Divide the kids into 2 groups and give each child a part of the sea soup. They then perform for the other half of the class, or even for other classes.


Read through the investigation, including the Teacher Background section.


Gather the materials that you will need.

Make the flannel board cutouts to retell the story, This is the Sea that Feeds Us. You may want to xerox the images from the book to create the cutouts, or create simple images or silhouettes on your own. 

Print and copy the Sea Soup recipe for student posters, or prepare a class-sized poster. See sample Sea Soup recipe poster.

Print and laminate the Lotto Cards. You may use the ones provided here, or create your own. You may want to focus on marine plants and animals, freshwater plants and animals, or sea soup ingredients.

Make and laminate  3-4 Lotto boards. Each board needs to have the same images as the ones on the Animal cards, and the pictures shold be placed differently on each board.

Sample Marine Lotto PDF

Sample Freshwater Lotto PDF

Set up the classroom to provide space for children to explore water centers.


Curricular Connections:

Literacy: Students write their own Sea Soup recipes, supported by a graphic organizer that assists them to color and write.

Ideas for adapting to different local environment or context: For freshwater and Interior environments, change the name of the activity to "River Soup," "Pond Soup," or "Bear Creek Soup" (name it for a local water feature).


Materials Needed for Investigation 2:  

Student Handouts

Science notebooks

(Optional: Sea Soup Recipe PDF)

Marine Lotto PDF

Freshwater Lotto PDF

Items for Group Display

This Is the Sea That Feeds Us by Robert F. Baldwin

Sea Soup by Mary Cerullo

Optional: Class poster template for Sea Soup Recipe

Material Items
  • Sequins, spangles, beads
  • Jars
  • Plankton nets
  • Water tubs
  • Local field guides or identification keys for rocks, shells, etc.
  • Inflatable globe
  • Flannel board and felt for cutouts
  • Lotto Cards and Lotto Boards (see samples)
  • Blue/green fabric sheet or butcher paper
  • Paper cups
Facility/Equipment Requirements 

Classroom space for exploration centers


Alaska Science Grade Level Expectations Addressed:

In Investigation 2, kindergarten students begin to build toward these K-12 Alaska Science Standards:

Science as Inquiry and Process
(A2) develop an understanding that the processes of science require integrity, logical reasoning, skepticism, openness, communication, and peer review.

Concepts of Life Science
(C2) develop an understanding of the structure, function, behavior, development, life cycles, and diversity of living organisms.

(C3) develop an understanding that all organisms are linked to each other and their physical environments through the transfer and transformation of matter and energy.

Essential Question:

  • What are the characteristics of the living and nonliving things you discover in the water?

Enduring Understandings:

  • Living and nonliving things in Alaska waters come in a great assortment of colors, shapes, and sizes.

  • Living things move, grow, and change.

Investigation 1 - Backyard Water Discovery

Class Time Required Activity 1A: 1 class period
Activity 1B: 1-2 class periods
Activity 1C: 1 class period
Activity 1D: 1-2 class periods
Activity 1E: 1 class period
Materials Needed
  • Inflatable globe
  • Chart paper and markers
  • 2-10 glass jars with lids
  • Water from a local outdoor source such as a tidepool or pond.
  • Soil, dirt, and/or rocks
  • Science notebooks
  • Pencils
  • Book: Water by Frank Asch
  • Clipboard
  • Camera
  • Magnifying glasses
Teacher Preparation

About 1 hour to assemble materials, determine location for walk, collect water samples, and set up science notebooks.

Prior Student Knowledge

Children will have used their senses of touch, taste, smell, sight and hearing to explore the properties of water.

It is helpful if students have had prior experiences in their science notebooks. If not, students will need an introduction to science notebooks.

Students need to be able to listen to other children as well as to speak and participate in a large group.

Experience using a magnifying lens. They tend to put the lens next to their eye and lean close to the object being observed.

Vocabulary

Adult, data, detective, diatom, direction, environment, globe, larva, magnify, map, observation, ocean, phytoplankton, plankton, planet, tally, zooplankton

Words for local water, such as: creek, harbor, lagoon, pond, river, sea, slough

Science GLEs Addressed

K-12 Standards A1, A2, B1, C3, G3

Investigation 1Overview: In this 4-5 day investigation, students begin their discovery of aquatic environments, and start to notice that water is all around them, in their neighborhoods, backyards, oceans, rivers, ponds, and creeks. They take a first look at "Our Big Blue Planet" with a globe game, inspect jars of water and land to think about the differences, and act as outdoor "Water Detectives" to explore and map water on a walk near their school. They finish up the investigation by taking a closer look to see living things in their jars of water.

Focus Questions:

  • Where is the water around us?
  • How is water different from the land?
  • Where is the water in our neighborhood?
  • Can we show where the water is around us?
  • What do we see when we look closely at water?


Activity 1A: Globe Toss

(one 25-minute class period)

Focus Question: Where is the water around us?

Engagement (5 minutes):
Show the class an inflatable globe. Ask students: What is this big ball? What do you know about our Big Blue Planet? Discuss the different shapes and colors seen, so that students understand what land and water look like on the globe. Note: Avoid using globes that are clear in the water areas. It may be useful to discuss the use of color on the globe.

Exploration (10 minutes):
Introduce the activity. Have students stand in a circle, and begin by tossing the globe to a student across the circle. The student catches the inflatable globe with two hands and looks where their hands are touching. He or she describes the location as "mostly water" or "mostly land." Practice this a few times.

Establish a few ground rules, such as:
Pass the globe to someone across the circle.
Call the name of the student you are passing to, before you toss the globe.
Everyone gets a turn.

When each student catches the globe, he or she tells the class what they are "mostly touching": land or water. The results are tallied on a large chart with two columns marked Land and Water. When the activity is finished, count the tally marks.

Explanation (10 minutes):
Ask students what they notice about the tally marks.
Which had more tallies: water or land? Why do you think (water or land) had more tallies?

Have the students look at the inflatable globe again, and ask:
Do you notice anything you hadn’t noticed before?

Encourage them to share what they notice, first with a partner, and then with the whole group. Record students’ comments.

Elaboration:
Encourage students to notice water around them on their trips to and from school. Where is the water they see? In what other places have they seen water?Evaluation: Notice students’ abilities to observe, estimate, and share what they know.


Activity 1B: What’s in the Jars?

(1-2 class periods)

Focus Question: How is water different from the land?

Engagement (20 minutes):
This activity requires a jar of water collected from a local outdoor source (ocean, pond, river) and a jar of land (soil and rocks), and allows children to begin the questioning process.

Put the jar of water in a paper bag. Have students ask questions to determine what might be in the bag. Guide the class with clues as needed, by telling them:

  • Living things grow and live in it.
  • It is wet.
  • It covers over half of our earth’s surface.

Let them think and discuss their ideas, defending their thinking if there is disagreement.

Show the students the jar of water, then show them the jar of land. Begin a discussion by telling them that these are two things that are part of their everyday life and they already know a lot about them. Explain that today they are going to make a list of ways that the water (in the ocean/river/pond) is different from land." Encourage students to respond with their own ideas. Use chart paper to make a list of all differences. After the class has generated a list of how water is different from land, reread the list.

Exploration (30 minutes):
Place the jar of water and jar of land at a science center, or for a whole class activity put jars of water and land at each table. Distribute science notebooks and a pencil. Review the list of differences brainstormed by the whole class. Support students to make an observation of the water and the land. Students will draw a picture of the water and draw a picture of the land in their science notebooks. Remind them to include the date and a title on the page. Those students who can write labels and/or words can also add those to the drawing.

Explanation:
As they finish their drawings and writing they can pair-share their science notebooks. As more students complete the activity, table groups can then share together.

Elaboration (30 Minutes):
Gather the class together for a story, and read Water by Frank Asch.

The discussion afterward can include questions such as: Where do we find water? What lives in the water around us? How do we know?

Evaluation:
Use class discussion and students’ science notebooks to evaluate their understanding.

A possible rubric to use for scoring follows:

Scoring Rubric:

4 Student drew a detailed picture of the jar of water and the jar of land. Title, date, and labels included.
3 Student drew a picture of the jar of water and the jar of land.
2 Student drew a picture of the jar of land but not the water.
1 Some attempts to draw were made.
0 No attempt.


Activity 1C: Water Detectives

(1 class period)

Focus Question: Where is the water in our neighborhood?

Engagement (15 minutes):
This is an awareness activity to focus on the topic of water. Reflect out loud to the class so that they can hear your reflections and wondering process; for example, "I’ve been thinking about our Globe Toss game. It makes me wonder about the water around us." Or "After thinking about the data from our Globe Toss game, I started asking myself: Where is the water in our neighborhood?"

stream
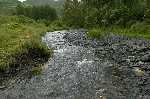
Ask the students for their ideas about where water might be found. You might write the ideas on chart paper, on cards, or on a clipboard that can be used on the walk as a checklist to see how many places the students were able to predict.

Prepare students to go for a walk outside to notice water in their local environment by having them dress for the weather. Since they will all be Water Detectives they will need to bring their "scientist eyes and ears" with them. Their job is to find water or evidence of water on their field trip.

Exploration (30 Minutes):
Go on a nature walk to find evidence of water around your school area and beyond. Encourage students to look beyond the school area if mountains, hills, or other features are visible. Look for evidence of water that might not be visible at this time, such as erosion, empty streambeds, or drainage ditches. Carry a clipboard and camera to record what students say and observe, and enlist the help of any additional adults on the field trip to do the same.

Explanation (10 minutes):
Back in the classroom, debrief from the field trip, recording information on a chart with the title "Water Detective Discoveries:"

What did you notice? Where was the water you discovered? Was it close or far away? What direction was the water going? What color was the water?

Read the comments children made while being Water Detectives, and add that information to the chart.

Elaboration:
Encourage students to continue to be Water Detectives on their way home. Where do they observe water? Where is the water near their home?

As homework, students can gather data and talk over their initial ideas about water with their family.

Evaluation:
Use a checklist or anecdotal notes to gather an understanding of individual understanding.

Activity 1D: Let’s Make a Map

(1-2 class periods)

Focus Question: Can we show where the water is around us?

Engagement (10 minutes):
Review with students some of the things they observed on their Water Detective walk the day before. Tell them that they will be going back to the same area to draw a "map" that will show where the water is located.

Exploration (30 minutes):
Distribute science notebooks for students to put in their backpacks. Go on a walk, returning to a place where you found water during the previous lesson. Allow each child to find his or her own space for making a map as well as an observational drawing of what they see, hear, and feel around them. Distribute pencils. Remind them to start with the date and a title. As students finish drawing and writing encourage them to share with a partner sitting next to them.

Explanation (20 minutes):
Complete the maps back in the classroom.

Model a science notebook page on chart paper. Ask questions: How did we get there? What was close by? What else can you add to your map? Suggest possible additions such as buildings, bridges, trees, rocks, and docks.

Allow time for students to complete their maps, and have each child share their map with a friend as they finish.

Gather the class together, and have students sit in a circle with their science notebooks on their laps. Ask students to share ideas from their maps, while you make a chart that records common elements from all maps. This is a great opportunity for students to learn from each other. List student ideas on a chart to model writing, and elements of a map.

Elaboration (10 minutes):
Begin an O-W-L Chart with the students. Record the Observations: what students were able to see and possibly what they inferred from what they noticed (for example if they saw garbage in a creek, they might have inferred that the water was dirty or that people had been near the water).

Ask students: "Now that you’ve seen water in our backyard, what are some things you OBSERVED about water?" Tell them: "Later on we’ll come back to: What are some things you WONDER about water? Eventually we’ll document: What have we LEARNED about water?"

Evaluation:
Notice which students are able to share observations of their work. Keep notes or a checklist so that you can make more explicit instruction available for those students who do not seem to be able to work independently.


Activity 1E: Take a Close Look

(1 class period)

Focus Question: What do we see when we look closely at water?

Engagement (10 minutes):
Show students the jar of water that they looked at in Activity 1B: What’s in the Jars? (The water will now be at least 5 days old, and if it has been collected from a tide pool, river, or puddle and left in the sun it will probably have a phytoplankton bloom and a green color.) Ask students what they notice about the water in the jar, and encourage them to share some observations with the whole class.

Prepare students to make an entry in their science notebooks. Tell students they will be working like scientists when they look closely and notice, and that scientists also record their observations. When scientists make observation they record the date and describe what they are looking at. Then they carefully draw what they see.

Exploration (20 minutes):
Place a jar of water at each table or work space.

Ask students to look closely at the jar of water at their table. Pose the following questions: "What do you notice about the water in jar? What colors do you see? Do you notice anything moving? Does the water look the same today as it did last week?" Provide magnifying glasses for each table. Encourage the students to use them.

Have each student draw a picture of what they observe in their science notebook.

Explanation (10 minutes):
Invite students to Pair-Share their science notebook observations.

Ask for volunteers to share with the whole class.

Elaboration (10-20 minutes):
Tell the students where the water in the jar was collected. If time allows, you may have students closely observe a jar of plain tap water that has also been sitting for 5 days, and make comparisons. Ask "Does water from the faucet have living things in it?" "What water is safe to drink?" Discuss the idea that water in our neighborhood has many living things in it that you don’t always see. As homework, students may bring back some evidence (small container, sketch, or photo) of water near their home that had something living in or near it.

Evaluation:
Use class discussion and students’ science notebooks to evaluate their understanding.


Teacher Preparation:

Tips from Teachers

Instead of jars of land and water, use trays to allow students to do more detailed drawings. Trays lend themselves better to more eyes, and  allow for closer observations and manipulations.

Place a finger puppet on one finger of the student catching the inflatable globe, such as a butterfly puppet.

Show the students a world map, to look at the water and the land.

If time does not allow a walk to notice were water is around the community, send a homework assignment to have each child got with their family to someplace with water and draw a picture and write about what they saw.

Read the Teacher Background for more information. Prior to Activity 1B, collect water from a local outdoor water source (ocean, river, or pond). Collect enough to fill 5 jars. (If you plan to do this as a science center activity instead of as a whole class activity, you may need only one jar of water). After completing the What’s in the Jars (1B) activity, place the jars of water in a sunny spot, and save them to use with the Take a Closer Look activity (1E).

For each table group, fill one jar with the water you collected and one jar with soil or rocks representing land.

Prior to Activity 1C, walk possible routes and decide where to take the students to find water in the neighborhood. Arrange for additional adult support as needed.

Science notebooks: Set up a page or two facing pages in the children’s science notebooks for Land and Water comparisons (1B), with spaces for a date, a title, and a drawing of each. Set up a page for making a map and drawing of neighborhood water (1D). Set up a page for recording observations of living things in the water (1E).


Curricular Connections:

Math. The Globe Toss activity helps students practice counting skills and introduces basic concepts of probability and statistics. Allow students to revisit this activity during center or choice time, and encourage students to collect additional data: are their hands touching mostly land or water? They can compare it with the class data chart.

Language Arts. Students develop speaking and listening skills, and begin to practice writing as they use labels with drawings.

Art. Students draw from their observations.

Additional connections to music and poetry can be made by bringing in a picture of the planet Earth from space, and song "Blue White Planet" by Raffi.


Materials Needed for Investigation 1:

Student Handouts

Science notebooks

Items for Group Display

Chart paper and markers

Book: Water by Frank Asch

Material Items
  • 2-10 glass jars with lids

  • Paper bag

  • Water from a local outdoor source such as a tide pool or pond

  • Soil and/or rocks

  • Pencils

  • Clipboard

  • Camera

  • Magnifying glasses

Facility/Equipment Requirements

Classroom space to store jars in direct sunlight.

An aquatic environment (pond, puddle, stream, slough, beach, etc.) within close walking distance of school.


Alaska Science Grade Level Expectations Addressed:

In Investigation 1, kindergarten students begin to build toward these K-12 Alaska Science Standards:

Science as Inquiry and Process
(A1) develop an understanding of the processes of science used to investigate problems, design and conduct repeatable scientific investigations, and defend scientific arguments.

(A2) develop an understanding that the processes of science require integrity, logical reasoning, skepticism, openness, communication, and peer review.

Concepts of Physical Science
(B1) develop an understanding of the characteristic properties of matter and the relationship of these properties to their structure and behavior.

Concepts of Life Science(C3) develop an understanding that all organisms are linked to each other and their physical environments through the transfer and transformation of matter and energy.

History and Nature of Science
(G3) develop an understanding that scientific knowledge is ongoing and subject to change as new evidence becomes available through experimental and/or observational confirmation(s).

Essential Question:

  • What are the characteristics of the living and nonliving things you discover in the water?

Enduring Understandings:

  • Living and nonliving things in Alaska waters come in a great assortment of colors, shapes, and sizes.

  • Living things move, grow, and change.


Alaska Sea Grant University of Alaska Fairbanks Alaska Department of Education and Early Development NOAA